
If you have a failed or failing parity drive in the array, or if you just want to replace one of them. This is how.
WARNING: Should not be done in UnRAID Version: 6.11.2 due to a bug fixed in 6.11.3.
Prerequisites
Before we begin make sure you have a new working drive. It should be the same size or higher then the one in use. It should also be at least as big as the largest data drive.
The Process
- First the array hast to be stopped. Go to the MAIN tab and click STOP, then click PROCEED
- Wait for the array to stop, this can take some time. When stopped you will be redirected to “Array Devices” automatically
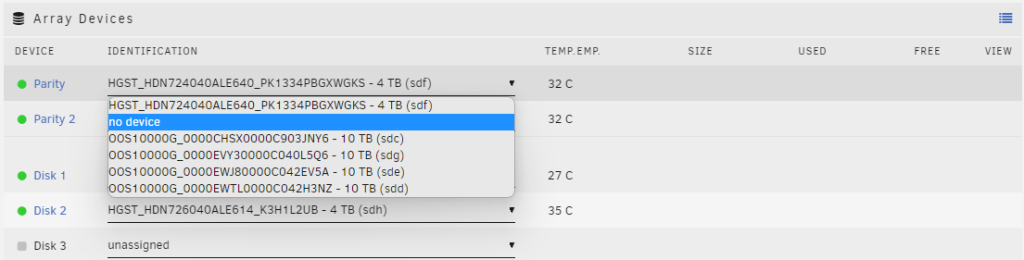
- On the disk you want to replace select “no device” under Identification.
- Check “Maintenance mode” (optional) and “Yes. I want to do this“, then click START.

- If you have your new drive already as unassigned in in UnRAID, skip these steps:
- Shut down your server by clicking MAIN -> REBOOT
- physically remove the old drive for then server (optional)
- Install the new drive physically in the server
- Boot the server
- Go to the MAIN tab and click STOP, then click PROCEED
- When stopped you will be redirected to “Array Devices” automatically
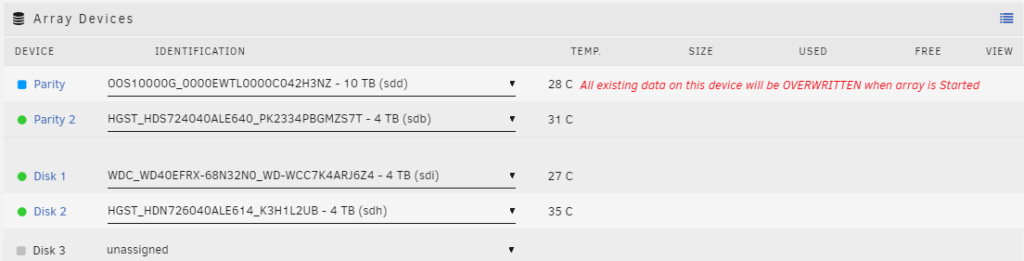
- The Disk is now marked “unassigned“, select your new drive from the drop-down menu below “Identification“
- Click START
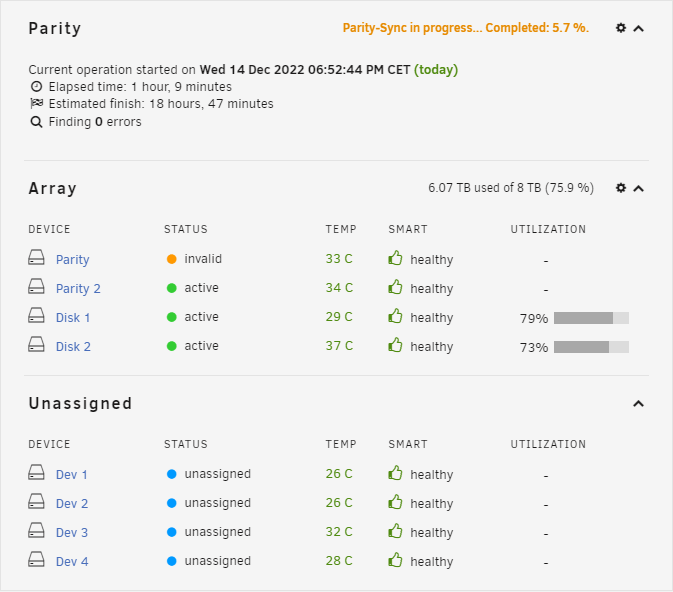
- The parity-sync will now start, the new drive will show as “invalid” in the dashboard until the process is complete.
You might use your system as normal when rebuilding, but remember you are one parity less then normal when rebuilding, so my recommendation is to not create to much unnecessary load on the system during this period.
Note: If you are replacing the “Parity 2″ instead of the”Parity” drive the operation will be called “Data-Rebuild”, not “Parity-Sync”. However, the steps taken is exact the same.
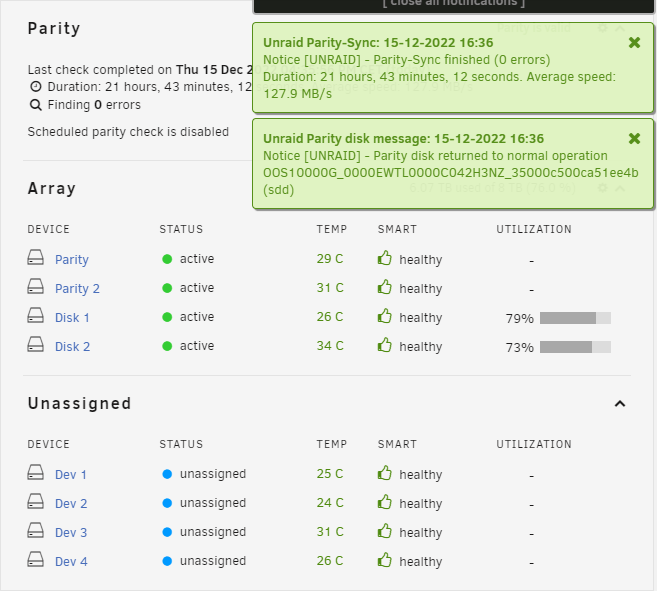
Process complete.
Sources
- https://forums.unraid.net/topic/112470-how-to-replace-a-drive-in-the-array-with-a-smaller-one/
- https://wiki.unraid.net/Replacing_a_Data_Drive
- https://www.youtube.com/watch?v=O5sQ65_6riA
- https://www.reddit.com/r/unRAID/comments/gljt4x/unraid_without_parity_disk/
- https://forums.unraid.net/topic/112470-how-to-replace-a-drive-in-the-array-with-a-smaller-one/
- https://www.youtube.com/watch?v=DZHv6ImVQ9k
- https://www.youtube.com/watch?v=K69uVDBCSWM