UPDATE 12.12.2023: From around december 2023 there has been a breaking update making the container to not start. The formating in the PAPERLESS_REDIS has changed.
Old way: PAPERLESS_REDIS: redis://[10.0.24.10]:6380
New way: PAPERLESS_REDIS: redis://10.0.24.10:6380
This guide is updated to reflect the new, working formating.
Ref: https://forums.unraid.net/topic/121075-support-paperless-ngx-docker/page/7/
This is a step-by-step guide on how to set up Paperless-ngx on UnRAID, I will not go into how you use it and configure the UI, but I will go trough all necessary steps to get it up an running. I might write an article about configuration and usage in a later post.
What is Paperless-ngx?
Paperless-ngx is a fork of Paperless-ng which is a fork of Paperless. It is a free and open-source document management system with built-in OCR (Optical character recognition) functionality. It is the perfect solution to store and organize all your receipts, contracts, document ect.
Before starting make sure you have the Community Applications plugin installed.
Set up document share
You don’t need a separate share specific to Paperless-ngx documents, but it is how I recommendation to do it.
In UnRAID:
- Go to SHARES and ADD SHARE
- Give it a name (example:
share_paperless-ngx_data) and click ADD SHARE. - Configure SMB Security Settings (optional) and click DONE
- You now have a new share “
share_paperless-ngx_data“.
Redis
Redis is an in-memory database required by Paperless-ngx, so this has to be installed.
- Go to APPS and Install “Redis” from jj9987.
- There is no need to add additional configuration. Click APPLY
- Command execution will look something like this:
docker run
  -d
  --name='Redis'
  --net='bridge'
  -e TZ="Europe/Berlin"
  -e HOST_OS="Unraid"
  -e HOST_HOSTNAME="UnRAID"
  -e HOST_CONTAINERNAME="Redis"
  -l net.unraid.docker.managed=dockerman
  -l net.unraid.docker.icon='https://raw.githubusercontent.com/juusujanar/unraid-templates/master/img/Redis-logo.png'
  -p '6379:6379/tcp' 'redis'
c275e5221bb13d99d392ee83f207b9a1fb18f30c12a44e086db20bb80ff55a36
Paperless-ngx
- Go to APPS and Install “paperless-ngx” from Selfhosters.
- Change the following parameters for path mapping:
Media:/mnt/user/share_paperless-ngx_data/media
(Container Path: /usr/src/paperless/media)
This is where all documents are stored.
Consumption:/mnt/user/share_paperless-ngx_data/consume
(Container Path: /usr/src/paperless/consume)
Documents placed in this folder is auto-imported into Paperless-NGX.
Export:/mnt/user/share_paperless-ngx_data/export
(Container Path: /usr/src/paperless/export)
This folder can be used by Paperless-ngx to make a complete backup, see https://docs.paperless-ngx.com/administration/#backup for details. - Configure the Redis database, replace 10.0.24.10 with the server’s IP.
PAPERLESS_REDIS: redis://10.0.24.10:6380 - OCR-Language should be set to the language(s) most of your documents are written in. Paperless-ngx is using the Tesseract OCR engine, so the correct language codes can be found here: https://tesseract-ocr.github.io/tessdoc/Data-Files-in-different-versions.html.
PAPERLESS_OCR_LANGUAGEis defining what language(s) that will be used while parsing documents. PAPERLESS_OCR_LANGUAGES is defining what languages that need to be installed. Naturally, the language must be installed to be used for parsing.
Example to configure English (eng) and Norwegian (nor) is written below:
PAPERLESS_OCR_LANGUAGE: eng+nor
PAPERLESS_OCR_LANGUAGES: eng nor
NOTE: PAPERLESS_OCR_LANGUAGE use “+” as separator, PAPERLESS_OCR_LANGUAGES use the space character. - Set your time zone. To get the correct format check out TZ Identifier in this table:
https://en.wikipedia.org/wiki/List_of_tz_database_time_zones
Example:
APERLESS_TIME_ZONE: Europe/Oslo - Change the
PAPERLESS_SECRET_KEYto something just long and random. No need to remember this.
PAPERLESS_SECRET_KEY: (some random long string) - Command execution will look something like this:
docker run
  -d
  --name='paperless-ngx'
  --net='bridge'
  -e TZ="Europe/Berlin"
  -e HOST_OS="Unraid"
  -e HOST_HOSTNAME="UnRAID"
  -e HOST_CONTAINERNAME="paperless-ngx"
  -e 'PAPERLESS_REDIS'='redis://[10.0.24.10]:6379'
  -e 'PAPERLESS_OCR_LANGUAGE'='eng+nor'
  -e 'PAPERLESS_OCR_LANGUAGES'='eng nor'
  -e 'PAPERLESS_FILENAME_FORMAT'='{created}-{correspondent}-{title}'
  -e 'PAPERLESS_TIME_ZONE'='Europe/Oslo'
  -e 'PAPERLESS_IGNORE_DATES'=''
  -e 'PAPERLESS_CONSUMER_POLLING'='0'
  -e 'PAPERLESS_SECRET_KEY'='98gyvwe84y84g5cm8wo4ymgx,oxg,my58ogh7,5h3589ohc578000flemmingss.com000ho37yo785yoh8735mod8xc35'
  -e 'USERMAP_UID'='99'
  -e 'USERMAP_GID'='100'
  -l net.unraid.docker.managed=dockerman
  -l net.unraid.docker.webui='http://[IP]:[PORT:8000]'
  -l net.unraid.docker.icon='https://raw.githubusercontent.com/selfhosters/unRAID-CA-templates/master/templates/img/paperless.png'
  -p '8000:8000/tcp'
  -v '/mnt/user/appdata/paperless-ngx/data':'/usr/src/paperless/data':'rw'
  -v '/mnt/user/share_paperless-ngx_data/media':'/usr/src/paperless/media':'rw'
  -v '/mnt/user/share_paperless-ngx_data/consume':'/usr/src/paperless/consume':'rw'
  -v '/mnt/user/share_paperless-ngx_data/export':'/usr/src/paperless/export':'rw' 'ghcr.io/paperless-ngx/paperless-ngx'
4748222ea35ad314ded13ce3b47a3030cb5de0600d37433d0af9ce07aebc2c15- Click on the Paperless-ngx icon in the DOCKER tab and select Console.
- In the console type
python manage.py createsuperuserto create your first user. - Fil inn a username and password (Email can be blank).
root@4748222ea35a:/usr/src/paperless/src# python manage.py createsuperuser
Username (leave blank to use 'root'): superuser
Email address:
Password:
Password (again):
Superuser created successfully.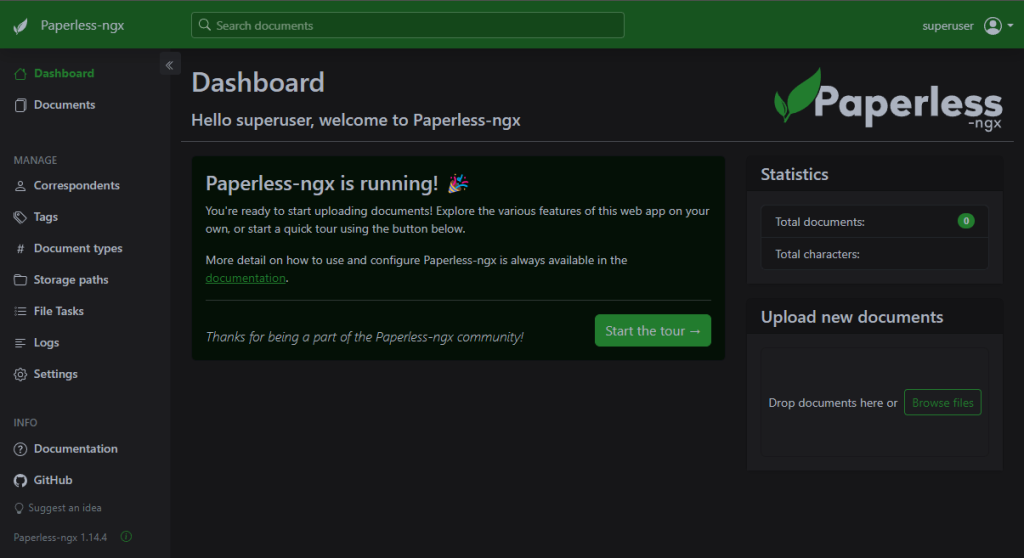
root@4748222ea35a:/usr/src/paperless/src# - Open your web-brower and go to http://<unraid_ip>:8000/ and log in with the newly created username and passord. Paperless-ngx is not up and Running!