
Installation with Legacy CPU
If you try to install ESXi 7 on an hardware with older CPU(s) that is no longer officially supported by VMware, you will get a error message similar to this when booting the installation medium:
VMB: 611:
Unsupported CPU: Intel family 0x06, model 0x1a, stepping 0x5
Intel(R) Xeon(R) CPU		E5520  @ 2.27GHz
See http://www.vmware.com/resources/compatibility
Even if it is unsupported it might work in practice.
To bypass this error in the boot, do as follows:
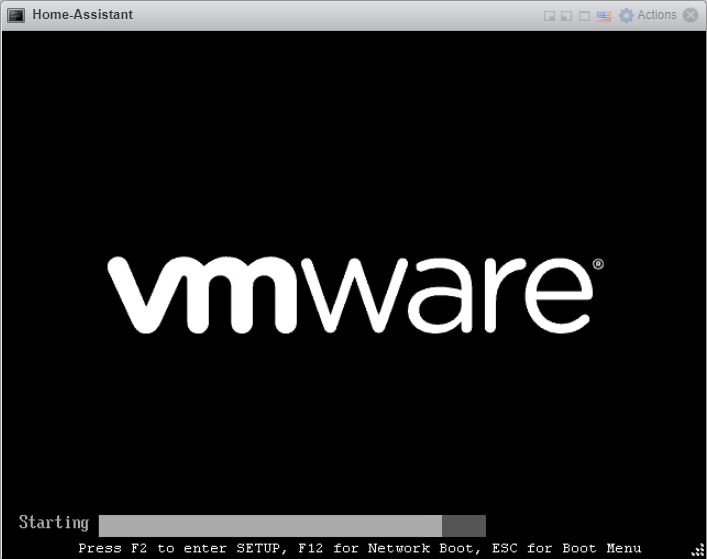
- Reboot into boot media again
- After the ESXi boot menu when the “Loading ESXi Installer” is starting click
SHIFT+Owithin 5 seconds to add boot options. - Type “
allowLegacyCPU=true” behind the line. Like this:
<ENTER: Apply options and boot>
> cdromBoot runweasel allowLegacyCPU=true- Click ENTER and continue installation as normal.
- Eventually you will come across error messages like this:
Error(s)/Warning(s) Found During System Scan

			Warning(s)

<CPU_SUPPORT WARNIG: The CPU in this host is not supported by
ESXi 7.0.0. Please refer to the VMware Compatibility Guide (VCG)
for the list of supported CPUs.>- Click ENTER to continue, and finnish the installation.
- After the installation medium is removed and the server is restarted the boot options have to be set every time you restart the server.
This can be avoided, read on.
Permanently allow boot from Legacy CPU
The easiest way to accomplish automatic boot with a legacy CPU is to do as follows:
- Shut down the ESXi Server and remove the boot-USB-drive.
- Insert the drive in another computer. It will contain two FAT-partitions.
- Open the the drive with multiple files including BOOT.CFG, and open it in a text-editor.
One of the partitions is just containing a BOOT.CFG file and nothing else. this is NOT the one you should edit.
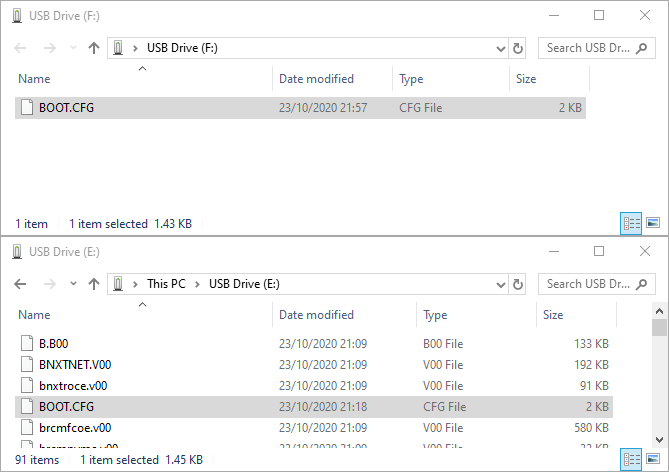
BOOT.CFG on- Add “
allowLegacyCPU=true” to the end of the line starting with “kernelopt=“
bootstate=0
title=Loading VMware ESXi
timeout=5
prefix=
kernel=b.b00
kernelopt=autoPartition=FALSE allowLegacyCPU=true
modules=jumpstrt.gz --- useropts.gz --- features.gz --- k.b00 --- uc_intel.b00 --- uc_amd.b00 --- uc_hygon.b00 --- procfs.b00 --- vmx.v00 --- vim.v00 --- tpm.v00 --- sb.v00 --- s.v00 --- bnxtnet.v00 --- bnxtroce.v00 --- brcmfcoe.v00 --- brcmnvme.v00 --- elxiscsi.v00 --- elxnet.v00 --- i40en.v00 --- i40iwn.v00 --- iavmd.v00 --- igbn.v00 --- iser.v00 --- ixgben.v00 --- lpfc.v00 --- lpnic.v00 --- lsi_mr3.v00 --- lsi_msgp.v00 --- lsi_msgp.v01 --- lsi_msgp.v02 --- mtip32xx.v00 --- ne1000.v00 --- nenic.v00 --- nfnic.v00 --- nhpsa.v00 --- nmlx4_co.v00 --- nmlx4_en.v00 --- nmlx4_rd.v00 --- nmlx5_co.v00 --- nmlx5_rd.v00 --- ntg3.v00 --- nvme_pci.v00 --- nvmerdma.v00 --- nvmxnet3.v00 --- nvmxnet3.v01 --- pvscsi.v00 --- qcnic.v00 --- qedentv.v00 --- qedrntv.v00 --- qfle3.v00 --- qfle3f.v00 --- qfle3i.v00 --- qflge.v00 --- rste.v00 --- sfvmk.v00 --- smartpqi.v00 --- vmkata.v00 --- vmkfcoe.v00 --- vmkusb.v00 --- vmw_ahci.v00 --- crx.v00 --- elx_esx_.v00 --- btldr.v00 --- esx_dvfi.v00 --- esx_ui.v00 --- esxupdt.v00 --- tpmesxup.v00 --- weaselin.v00 --- loadesx.v00 --- lsuv2_hp.v00 --- lsuv2_in.v00 --- lsuv2_ls.v00 --- lsuv2_nv.v00 --- lsuv2_oe.v00 --- lsuv2_oe.v01 --- lsuv2_oe.v02 --- lsuv2_sm.v00 --- native_m.v00 --- qlnative.v00 --- vdfs.v00 --- vmware_e.v00 --- vsan.v00 --- vsanheal.v00 --- vsanmgmt.v00 --- xorg.v00 --- imgdb.tgz --- state.tgz
build=7.0.0-1.25.16324942
updated=1- Save the file and move the drive back to the server
- Start the server, ESXi should now boot up without the need of any manual boot option input.
Fixing “This host does not support virtualizing real mode” error
Now when VMware ESXi 7.0 is up and running and all looks good you still might run into problems, not unlikely this one (when trying to start a VM):
Failed to power on virtual machine Home-Assistant. This host does not support virtualizing real mode. The Intel "VMX Unrestricted Guest" feature is necessary to run this virtual machine on an Intel processor. Click here for more details.
Power On VM
Key
haTask-2-vim.VirtualMachine.powerOn-3629474806
Description
Power On this virtual machine
Virtual machine:

Home-Assistant
State
Failed - This host does not support virtualizing real mode. The Intel "VMX Unrestricted Guest" feature is necessary to run this virtual machine on an Intel processor.

Errors
- This host does not support virtualizing real mode. The Intel "VMX Unrestricted Guest" feature is necessary to run this virtual machine on an Intel processor.
- Module 'CPUIDEarly' power on failed.
- Failed to start the virtual machine.
This issue has to be solved for every current and future VM, but the process is easy and fast when you know how.
- Click “Edit” on the VM
- Select “VM Options”
- Open “Advanced” and select “Edit Configuration…”
- Click “Add parameter” and fill as follows:
Key:monitor.allowLegacyCPU
Value:true
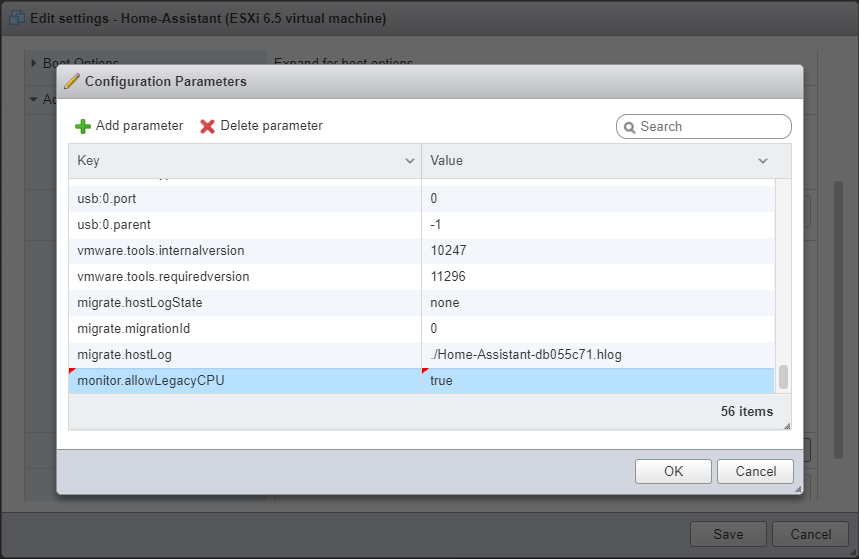
- Click “OK” and “Save”
- The VM should now work, but be patient. It can take a very long time to boot.
I hope this is to good use. Running unsupported is however not recommended, but for uncritical servers why not.
Sources:
- https://www.youtube.com/watch?v=RbHGeN-T-dg
- https://www.virtuallyghetto.com/2020/04/quick-tip-allow-unsupported-cpus-when-upgrading-to-esxi-7-0.html
- https://planetvm.net/blog/?p=3253
- https://www.enterpriseinfosec.net/install-vmware-esxi-7-on-a-r710-with-an-intel-55xx-cpu/