
I have newly successfully completed the setup of a Reverse Proxy with SSL on my pfSense router.
Because there is a lack of complete guides for this on the internet I wrote down my steps here in this complete walk-through.
Because of the massive amount of steps needed to achieve this I will mostly just write what to do, and not explain a lot of why.
This guide is based on the following software versions:
- pfSense 2.4.5-RELEASE-p1
- Acme 0.6.8_1
- HAProxy 0.60_4
Enjoy!
Content
Table of contents
What and why
The goal for me was to access multiple services behind my firewall from the internet with HTTPS.
The goal is to access my services with domains like https://home-assistant.mydomain.com/ and https://mstream.mydomain.com/.
unlike before: http//public_ip:1234.
And it should be done with a valid signed SSL certificate.
Domain
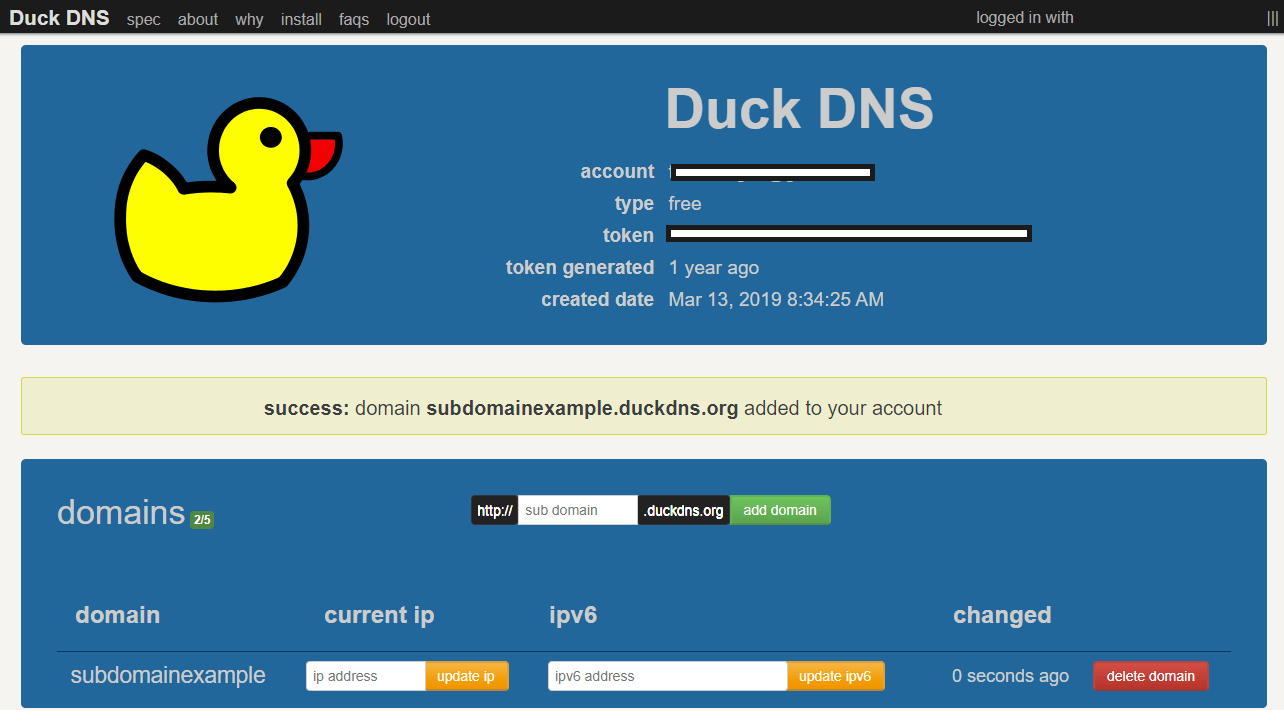
DuckDNS
If your public IP is dynamic (as it is in most cases) you will benefit from using a dynamic DNS service such as DuckDNS.
This is a free and easy service to use. Your TLD will later be configured to point to the dynamic DNS address.
- Log in/sign up to https://www.duckdns.org/
- Right to domains input a sub domain name and click add domain.
- Write down your token and domain for later use.
Get a Top-level domain at NameSilo
First you will need a top level domain to be used for this for this purpose.
I Recommend to find and buy one at NameSilo.
https://www.namesilo.com/domain/search-domains
Get a $1.00 discount using my referral: Link/Code: https://www.namesilo.com/?rid=33eef66ry
(Use code “flemmingss.com”)
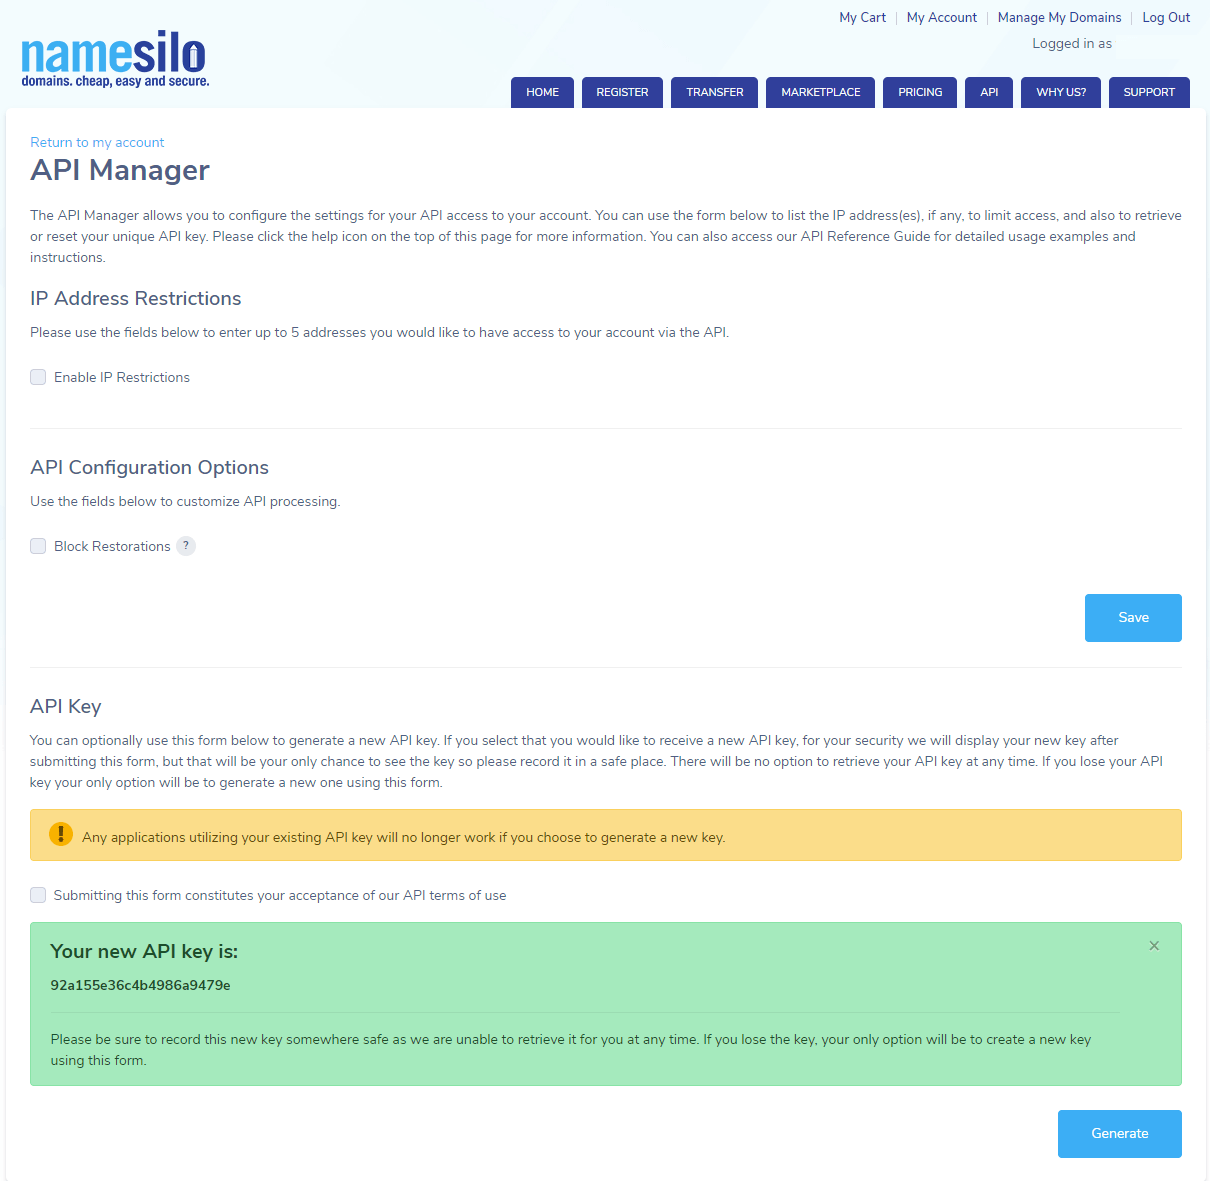
Generate a NameSilo API Key
This will be used in the process of Issuing a certificate later
- Go to API Manager https://www.namesilo.com/account/api-manager
- Under API Key check “Submitting this form constitutes your acceptance of our API terms of use” and click Generate
- Copy your API key and save it for later.
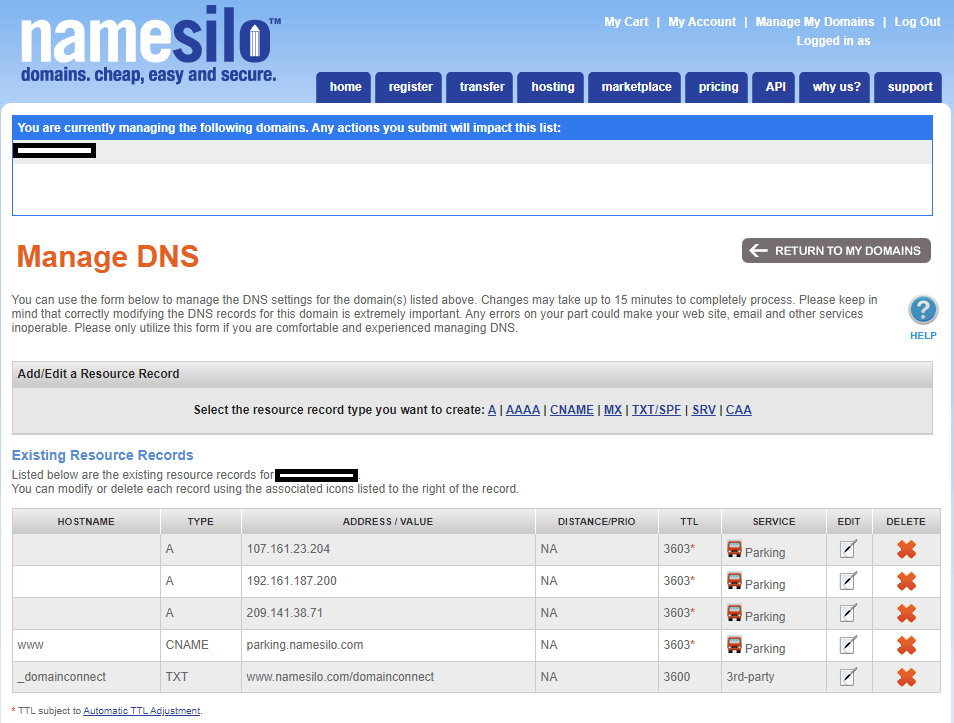
Redirect domain to DuckDNS
- Go to https://www.namesilo.com/account_domains.php and click on your domain
- Select Update Next to NS Records:
- Remove all the existing resource records assigned to the domain.
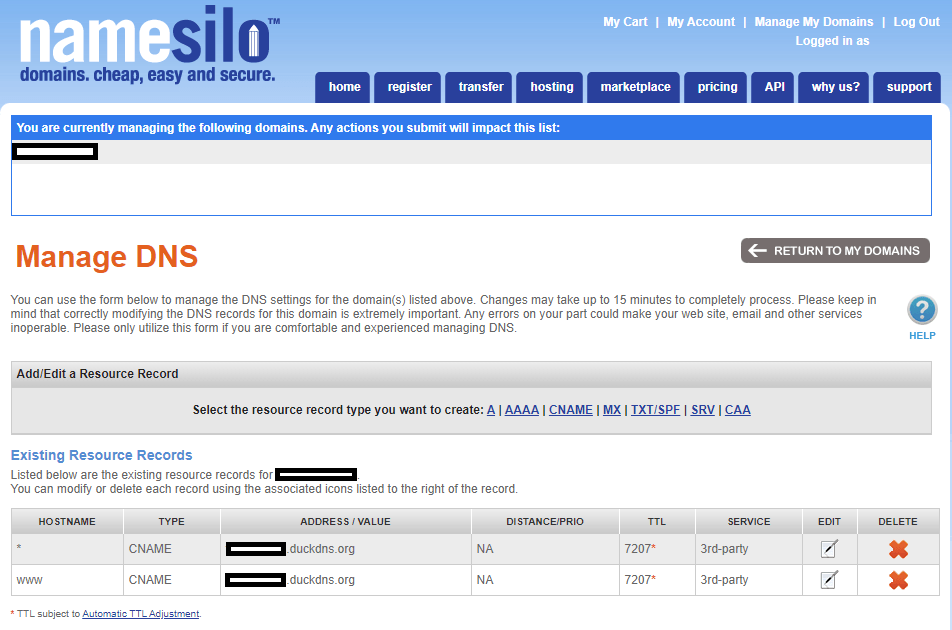
- Select CNAME to create two new CNAME records like this:
HOSTNAME:*TARGET HOSTNAME:domain.duckdns.org
HOSTNAME:wwwTARGET HOSTNAME:domain.duckdns.org
pfSense
Dynamic DNS
Set up DuckDNS
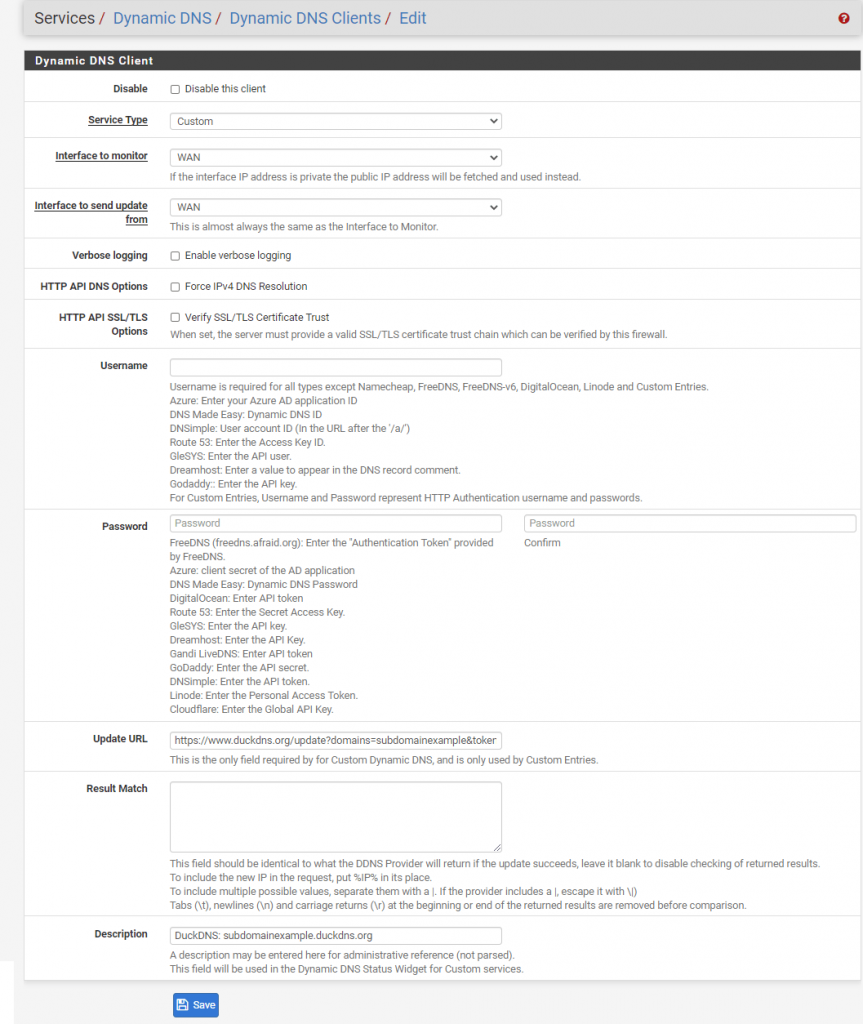
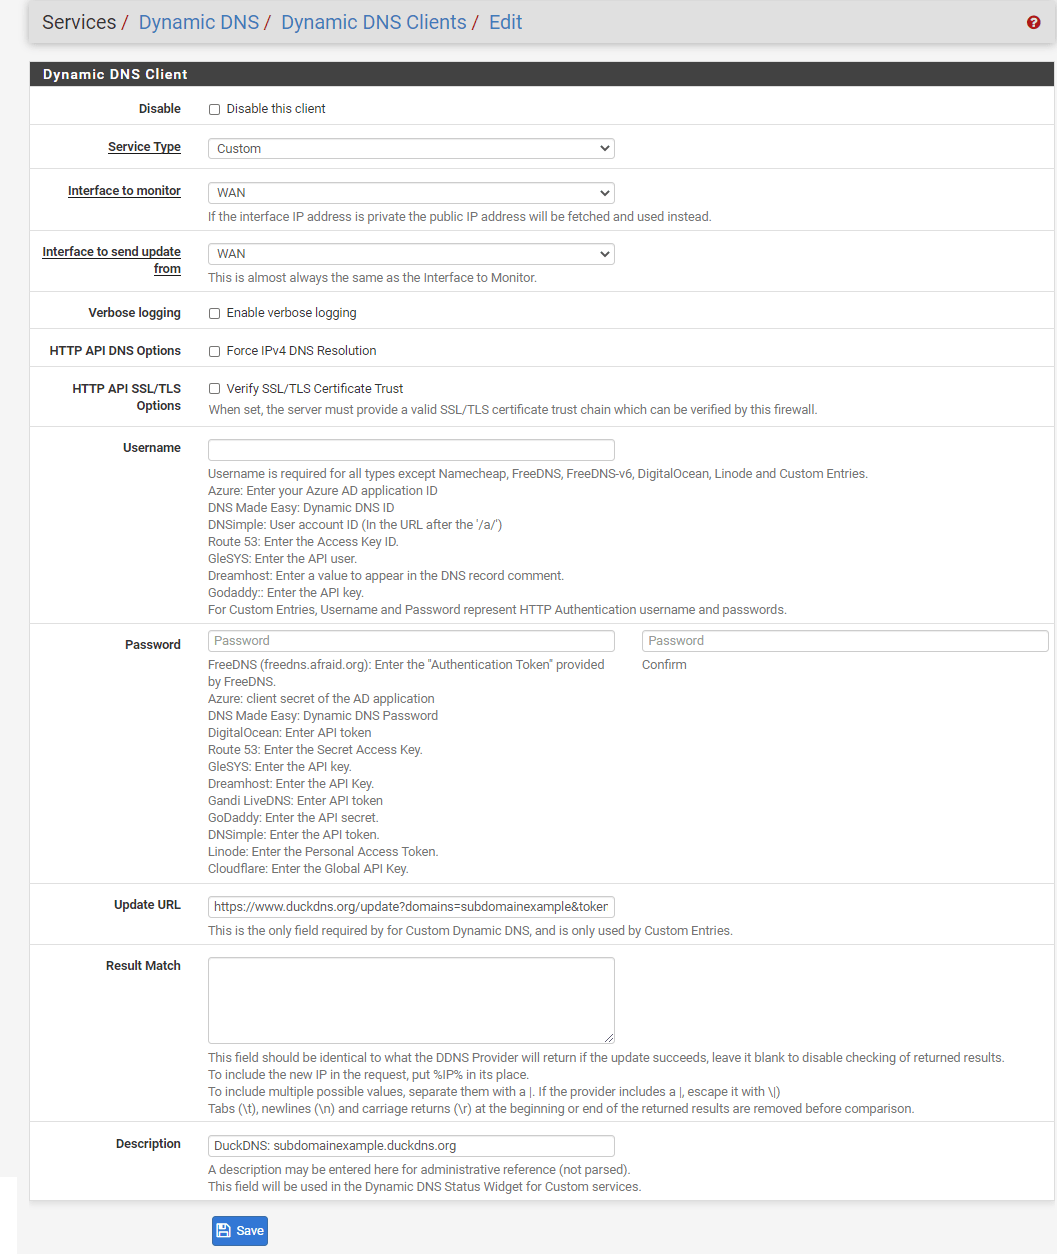
- In pfSense Go to Services -> Dynamic DNS -> Dynamic DNS Clients and click Add.
- Fill out as follows:
Service Type: Custom
Update URL:https://www.duckdns.org/update?domains=XXX&token=YYY&ip=%IP%(Replace XXX with your DuckDNS subdomain and YYY with your DuckDNS token)
Description: DuckDNS: subdomainexample.duckdns.org (Optional field, example) - Click Save
- Select Edit on tne same Dynamic DNS Clients record and select Save & Force Update.
“Cached IP” Should now be your public WAN IP.
Setup 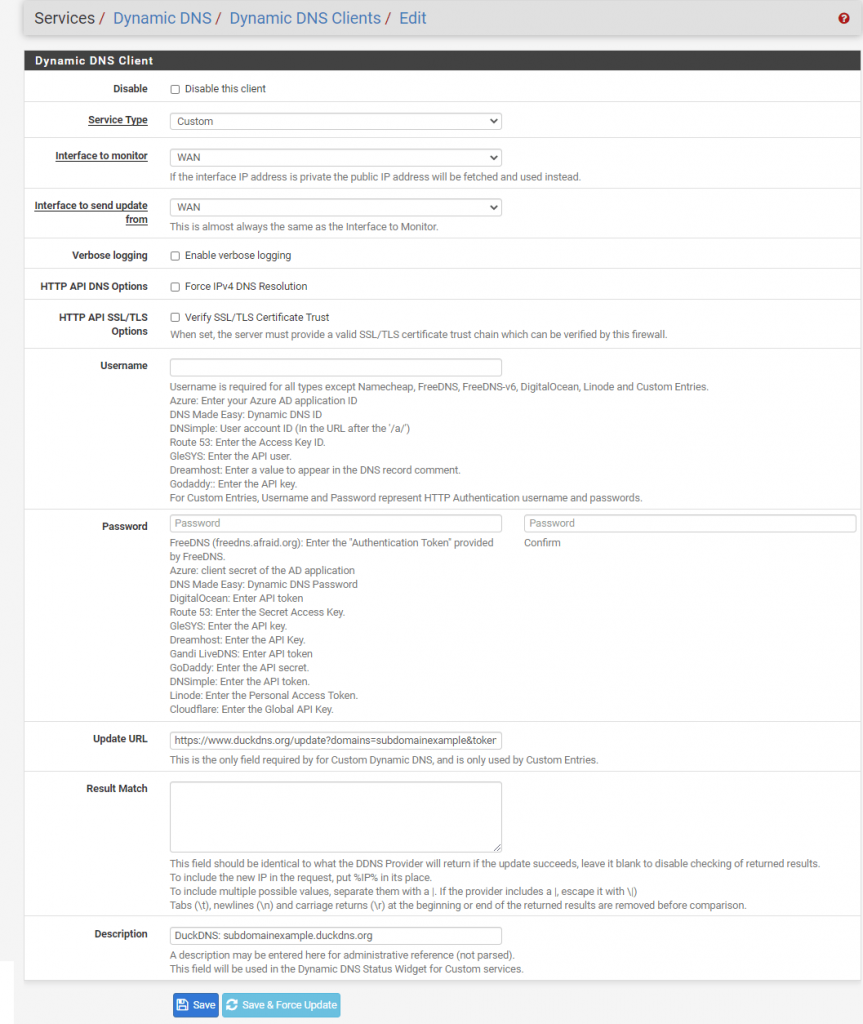
Edit

Acme
Install the pfSense Acme Package
- Open pfSense and navigate to System -> Package Manager -> Available Packages.
- Select Install next to acme and then select Confirm.
Account keys
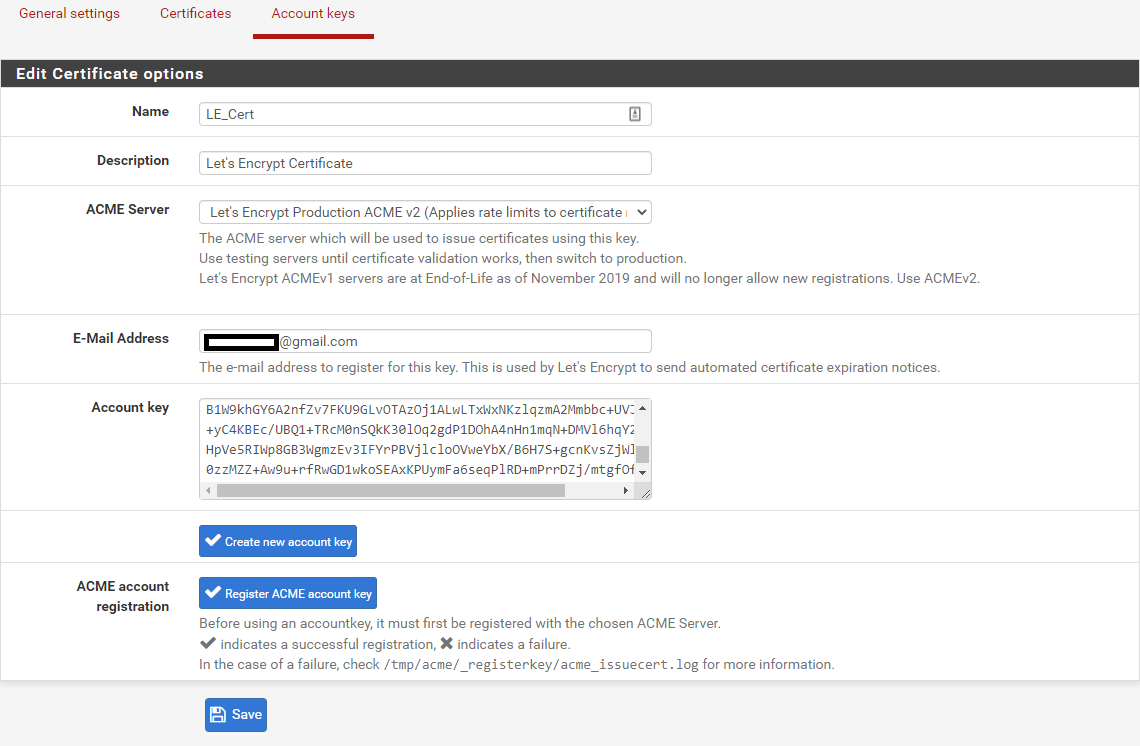
- In pfSense go to Services -> Acme -> Account keys and click Add.
- Fill out as follows:
Name: LE_Cert (Example)
Description: Let’s Encrypt Certificate (Optional field, example)
ACME Server: Let’s Encrypt Production ACME v2 (Applies rate limits to certificate requests)
E-Mail Address: youremail@gmail.com (Example) - Click on Create new account key and wait until the Account key-filed are filled.
- Click Register ACME account key and wait for the successful registration check-mark.
- Click Save.
Certificates
- In pfSense go to Services -> Acme -> Certificates and click Add.
- Fill out as follows:
Name: LE_Root_Cert (Example)
Description: Let’s Encrypt Root Certificate (Optional field, example)
Domain SAN list:- Mode: Enabled
- Domainname: *.yourdomain.com
- Method: DNS-Namesilo
- API Token: 12345678-1234-1234-1234-12345678912 (Example)
- click Save.

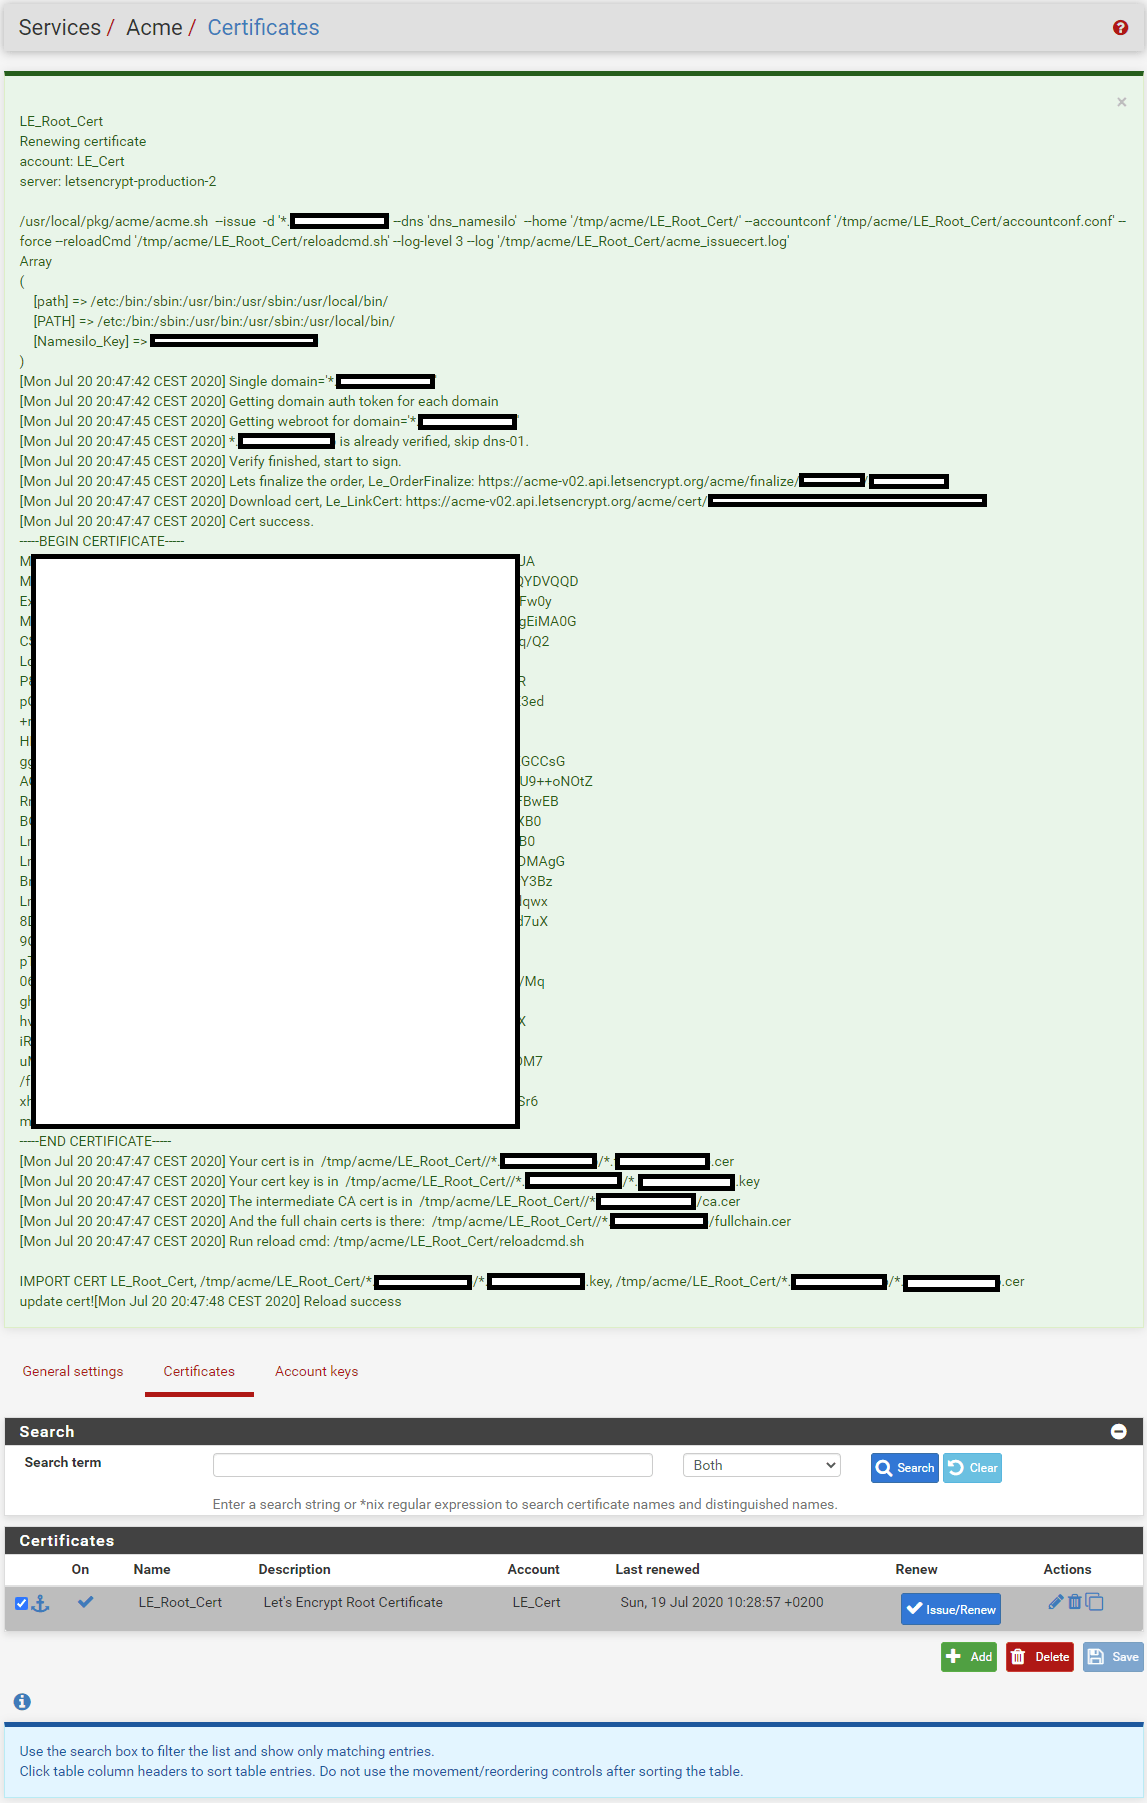
- Back on Services -> Acme -> Certificates select Issue/Renew under Renew on the created certificate.
Wait for it to finnish and don’t click anything yet, this operation can take a little time. - If successful a green background with a lot of text will appear.
General settings
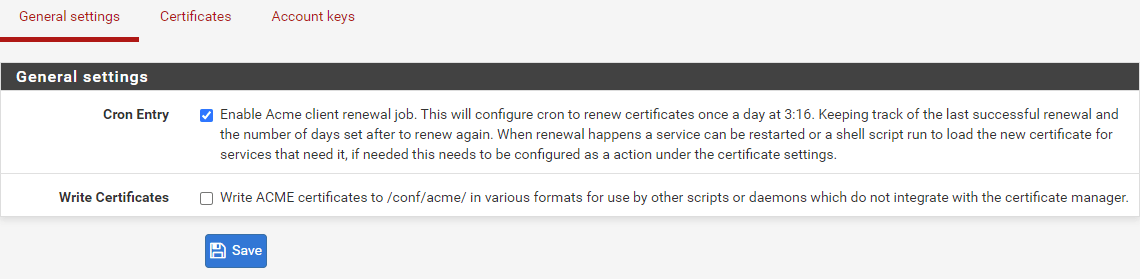
- In pfSense go to Services -> Acme -> General settings and check Cron Entry.
This will make the certificate renewal process automatic. - Click Save.
Firewall
Virtual IP
- In pfSense go to Firewall -> Virtual IP and click Add.
- Fill out as follows:
Type: IP Alias
Interface: LAN (Or a VLAN as in my example)
Address(es): 10.0.24.99 (Example) / 32
Make sure the above IP-address is not part of a DHCP server address range. Also make sure /32 is selected.
Description: Virtual IP for HAProxy (Optional field, example) - Click Save.
- Click Apply Changes.

NAT
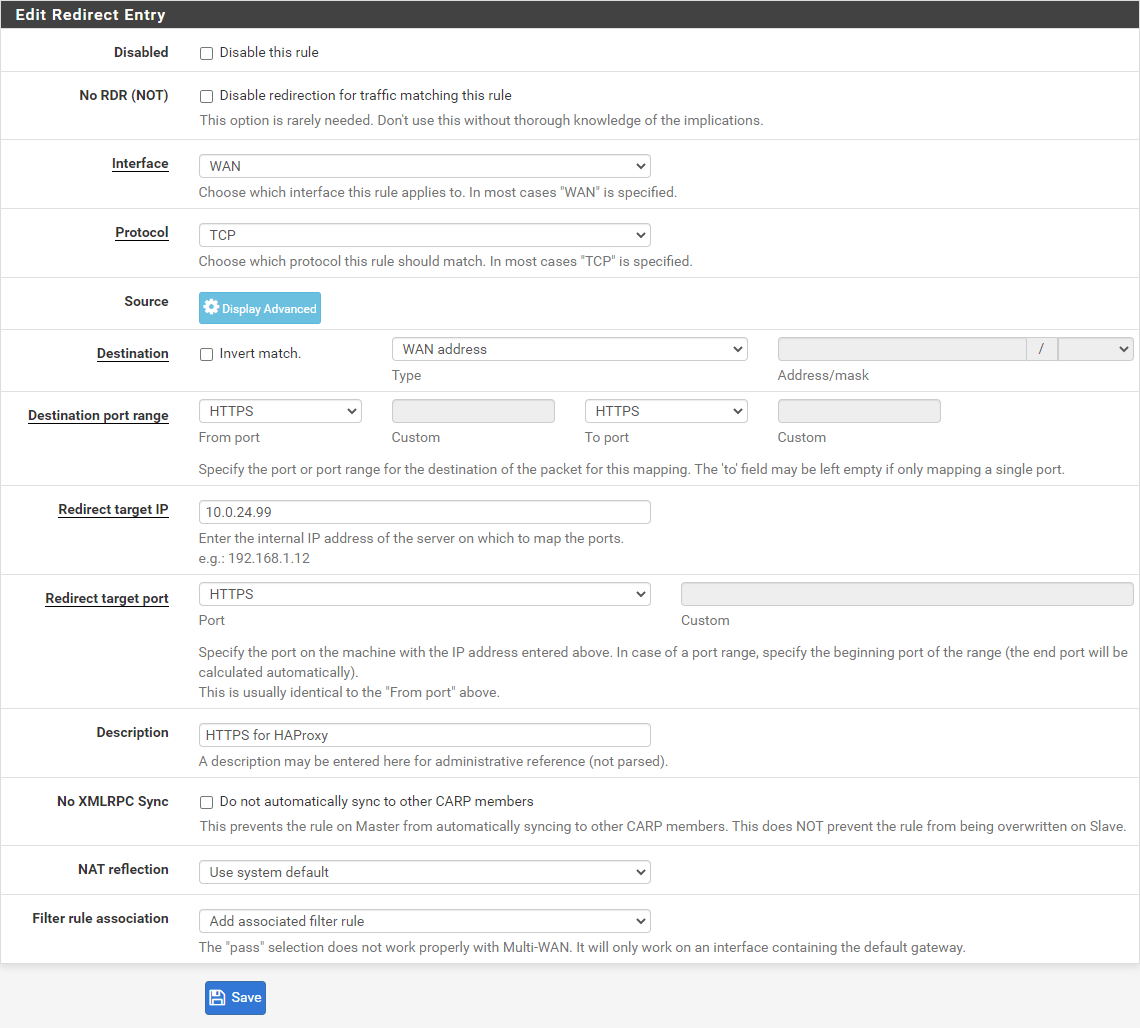
- In pfSense go to Firewall -> NAT and click Add.
- Fill out as follows:
Interface: WAN
Protocol: TCP
Destination port range: HTTPS (From port) HTTPS (To port)
Redirect target IP: 10.0.24.99 (The Virtual IP)
Redirect target port: HTTPS
Description: HTTPS for HAProxy (Optional field, example) - Click Save.
- Click Apply Changes.
HAProxy
Install the pfSense HAProxy Package
Now it is time to install another package, this one is named “haproxy”.
- Open pfSense and navigate to System -> Package Manager -> Available Packages.
- Select Install next to haproxy and then select Confirm.
Settings
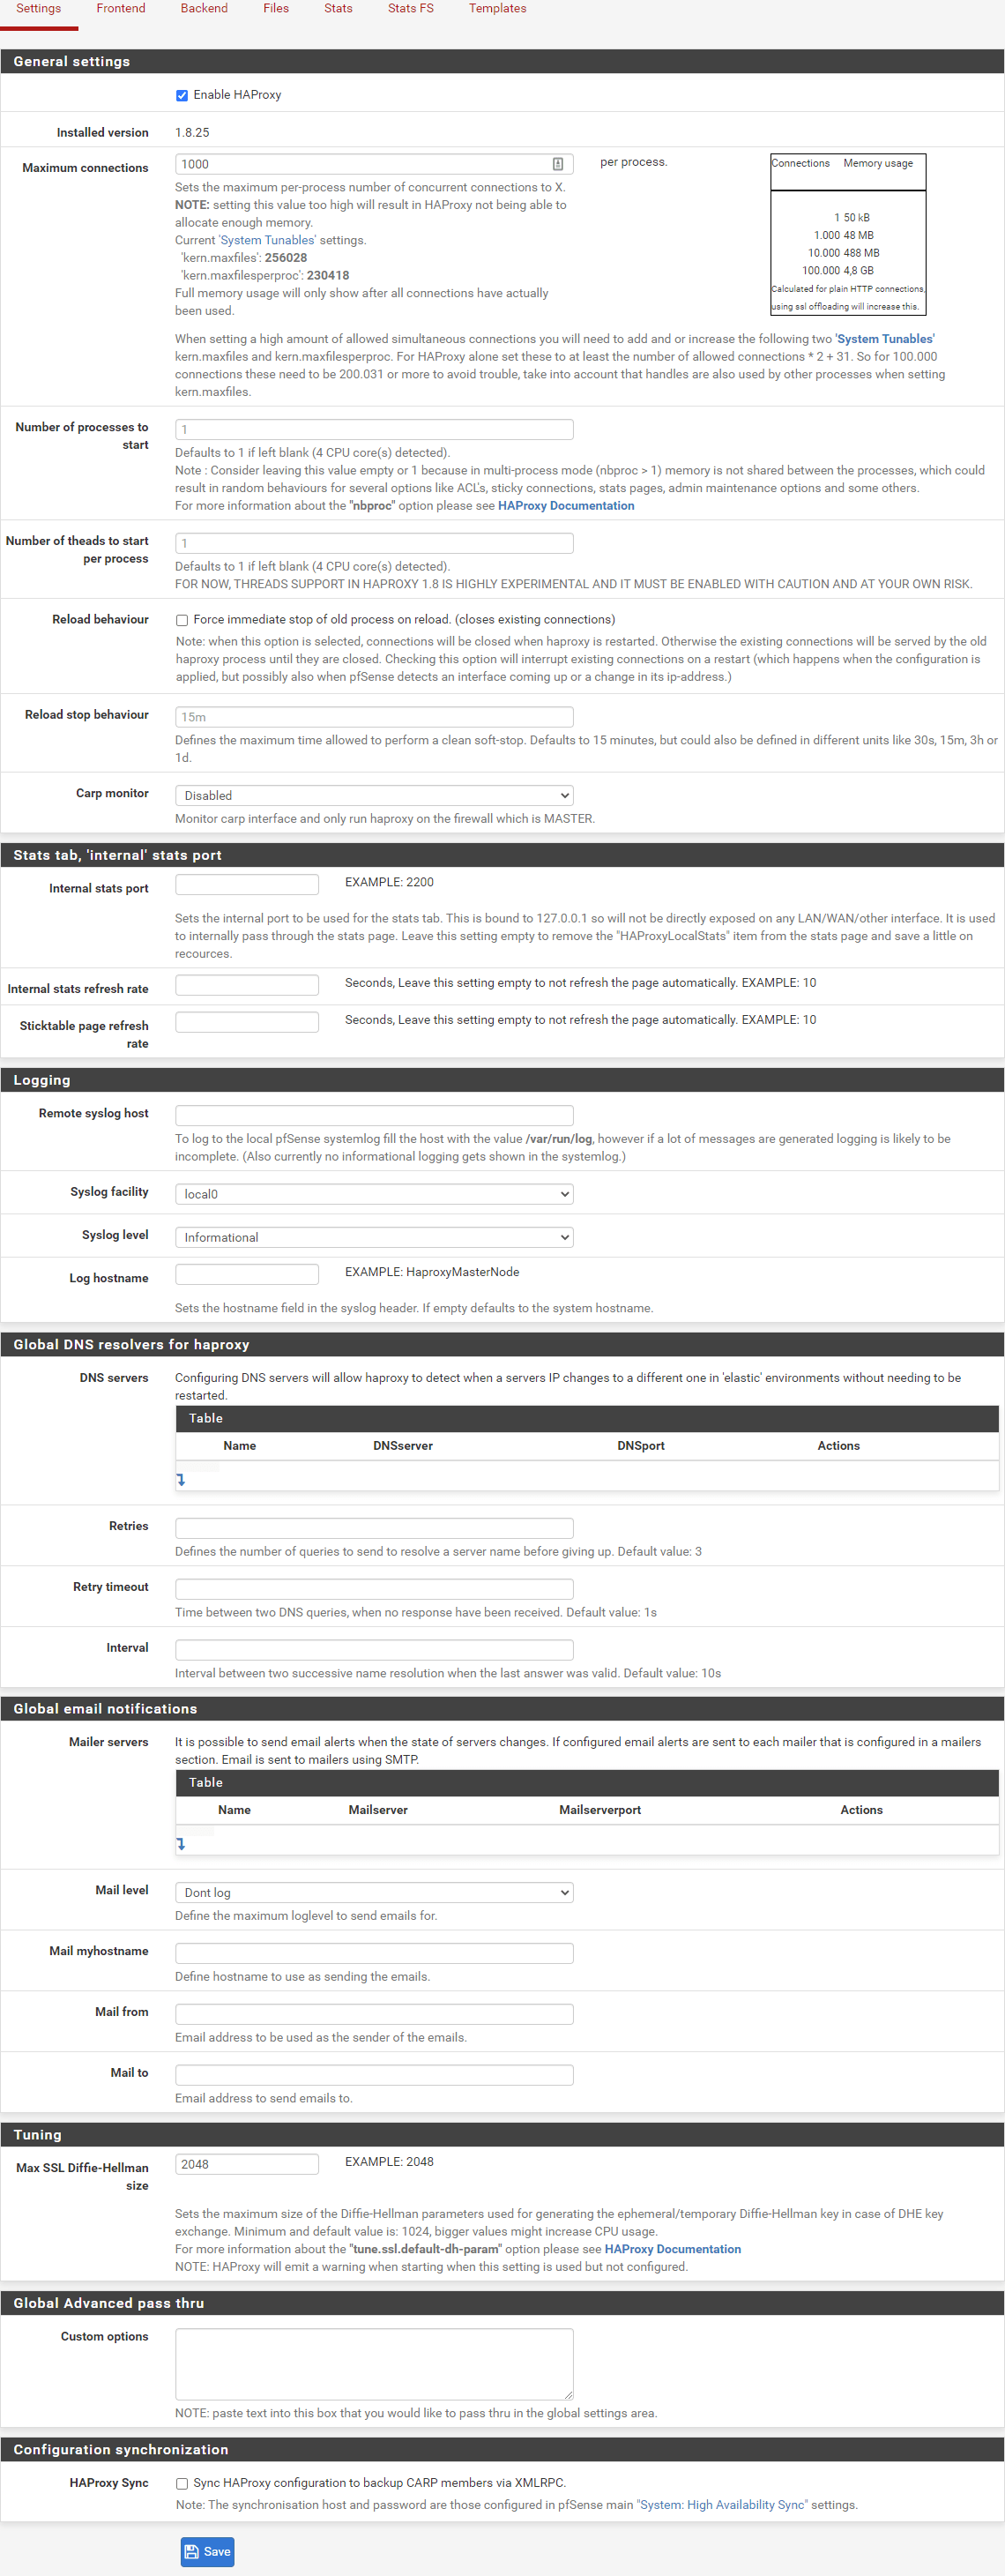
- In pfSense go to Services -> HAProxy -> Settings.
- Check the Enable HAProxy checkbox
- Fill out as follows:
- General settings:
Maximum connections: 1000 (Example) - Tuning:
Max SSL Diffie-Hellman size: 2048 (Example)
- General settings:
- Click Save.
- Click Apply Changes.
Backend
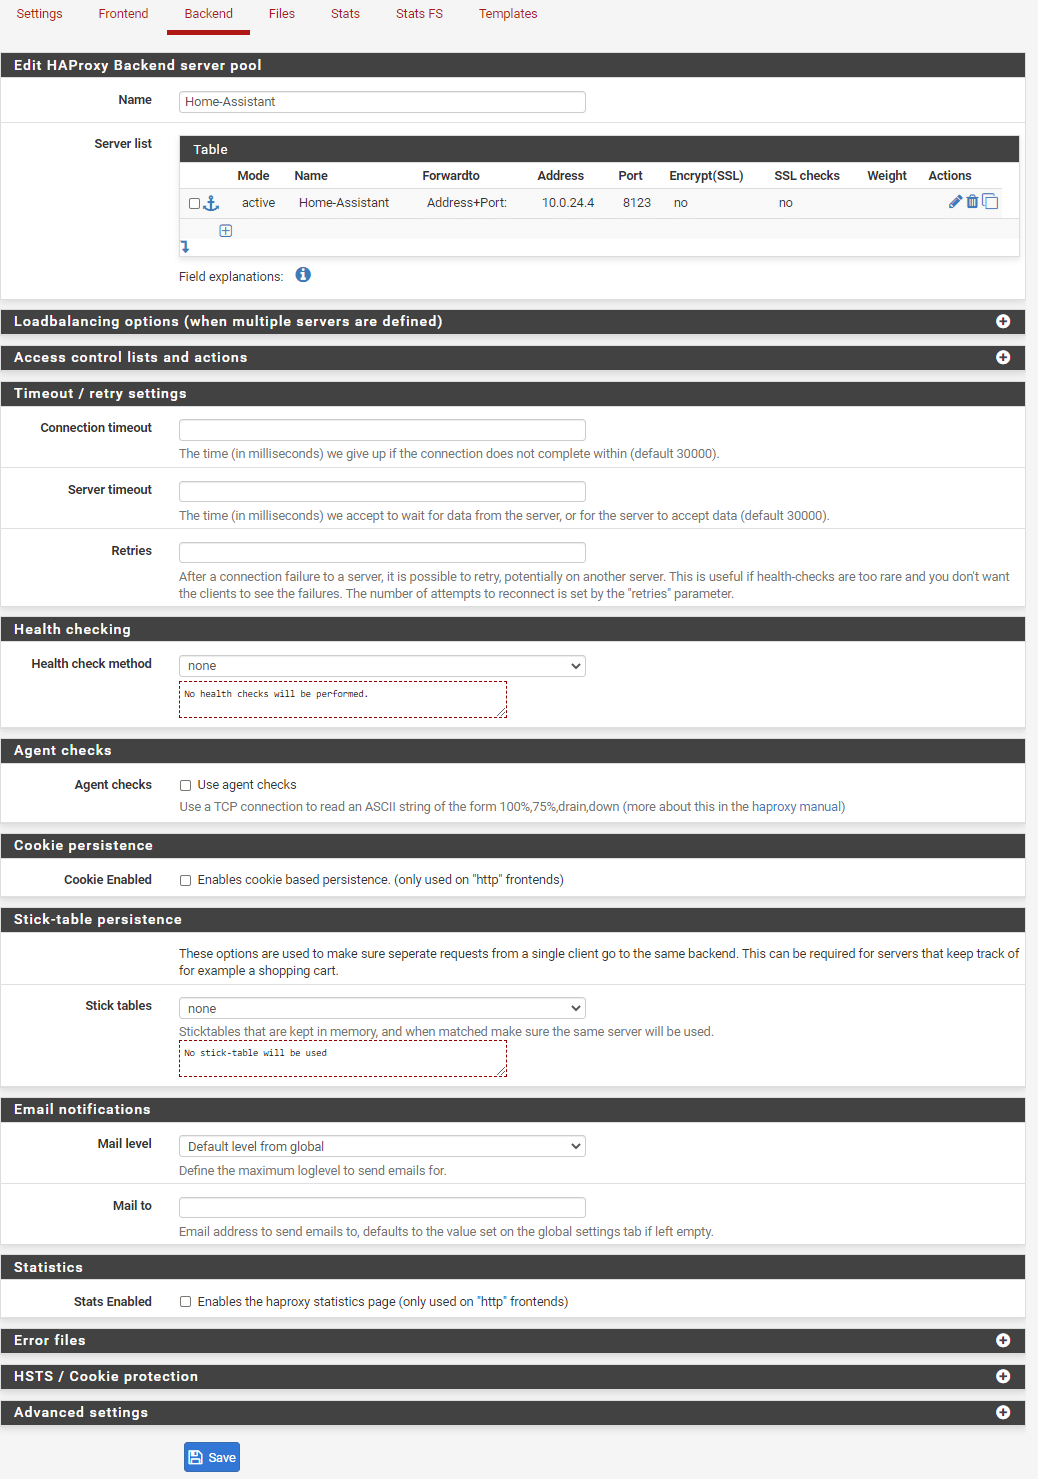
In the HAProxy Backend you will need a backend set up for each service you will connect to trough the reverse proxy.
- In pfSense go to Services -> HAProxy -> Backend and click Add.
- Fill out as follows:
- Edit HAProxy Backend server pool:
- Server list
Name: Service Name
Address: Service IP
Port: Service Port
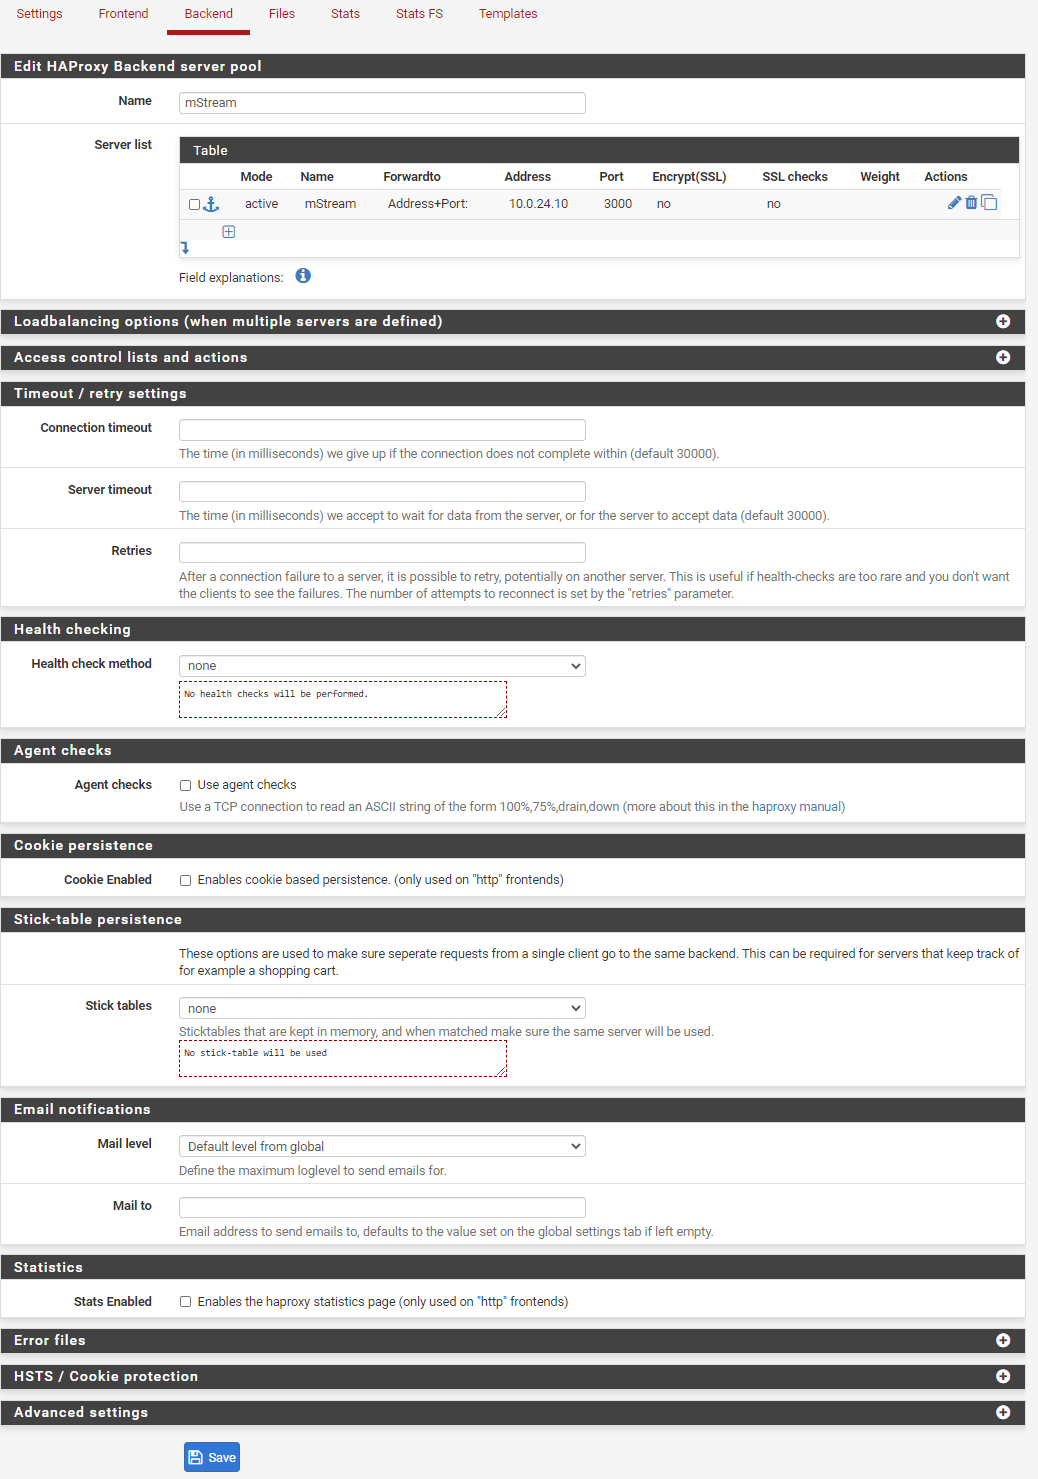
Two Examples of server list settings:
Name: Home-Assistant
Address: 10.0.24.4
Port: 8123
Name: mStream
Address: 10.0.24.10
Port: 3000
- Server list
- Edit HAProxy Backend server pool:
- Click Save.
- Click Apply Changes.

Home-Assistant backend example 
mStream backend example
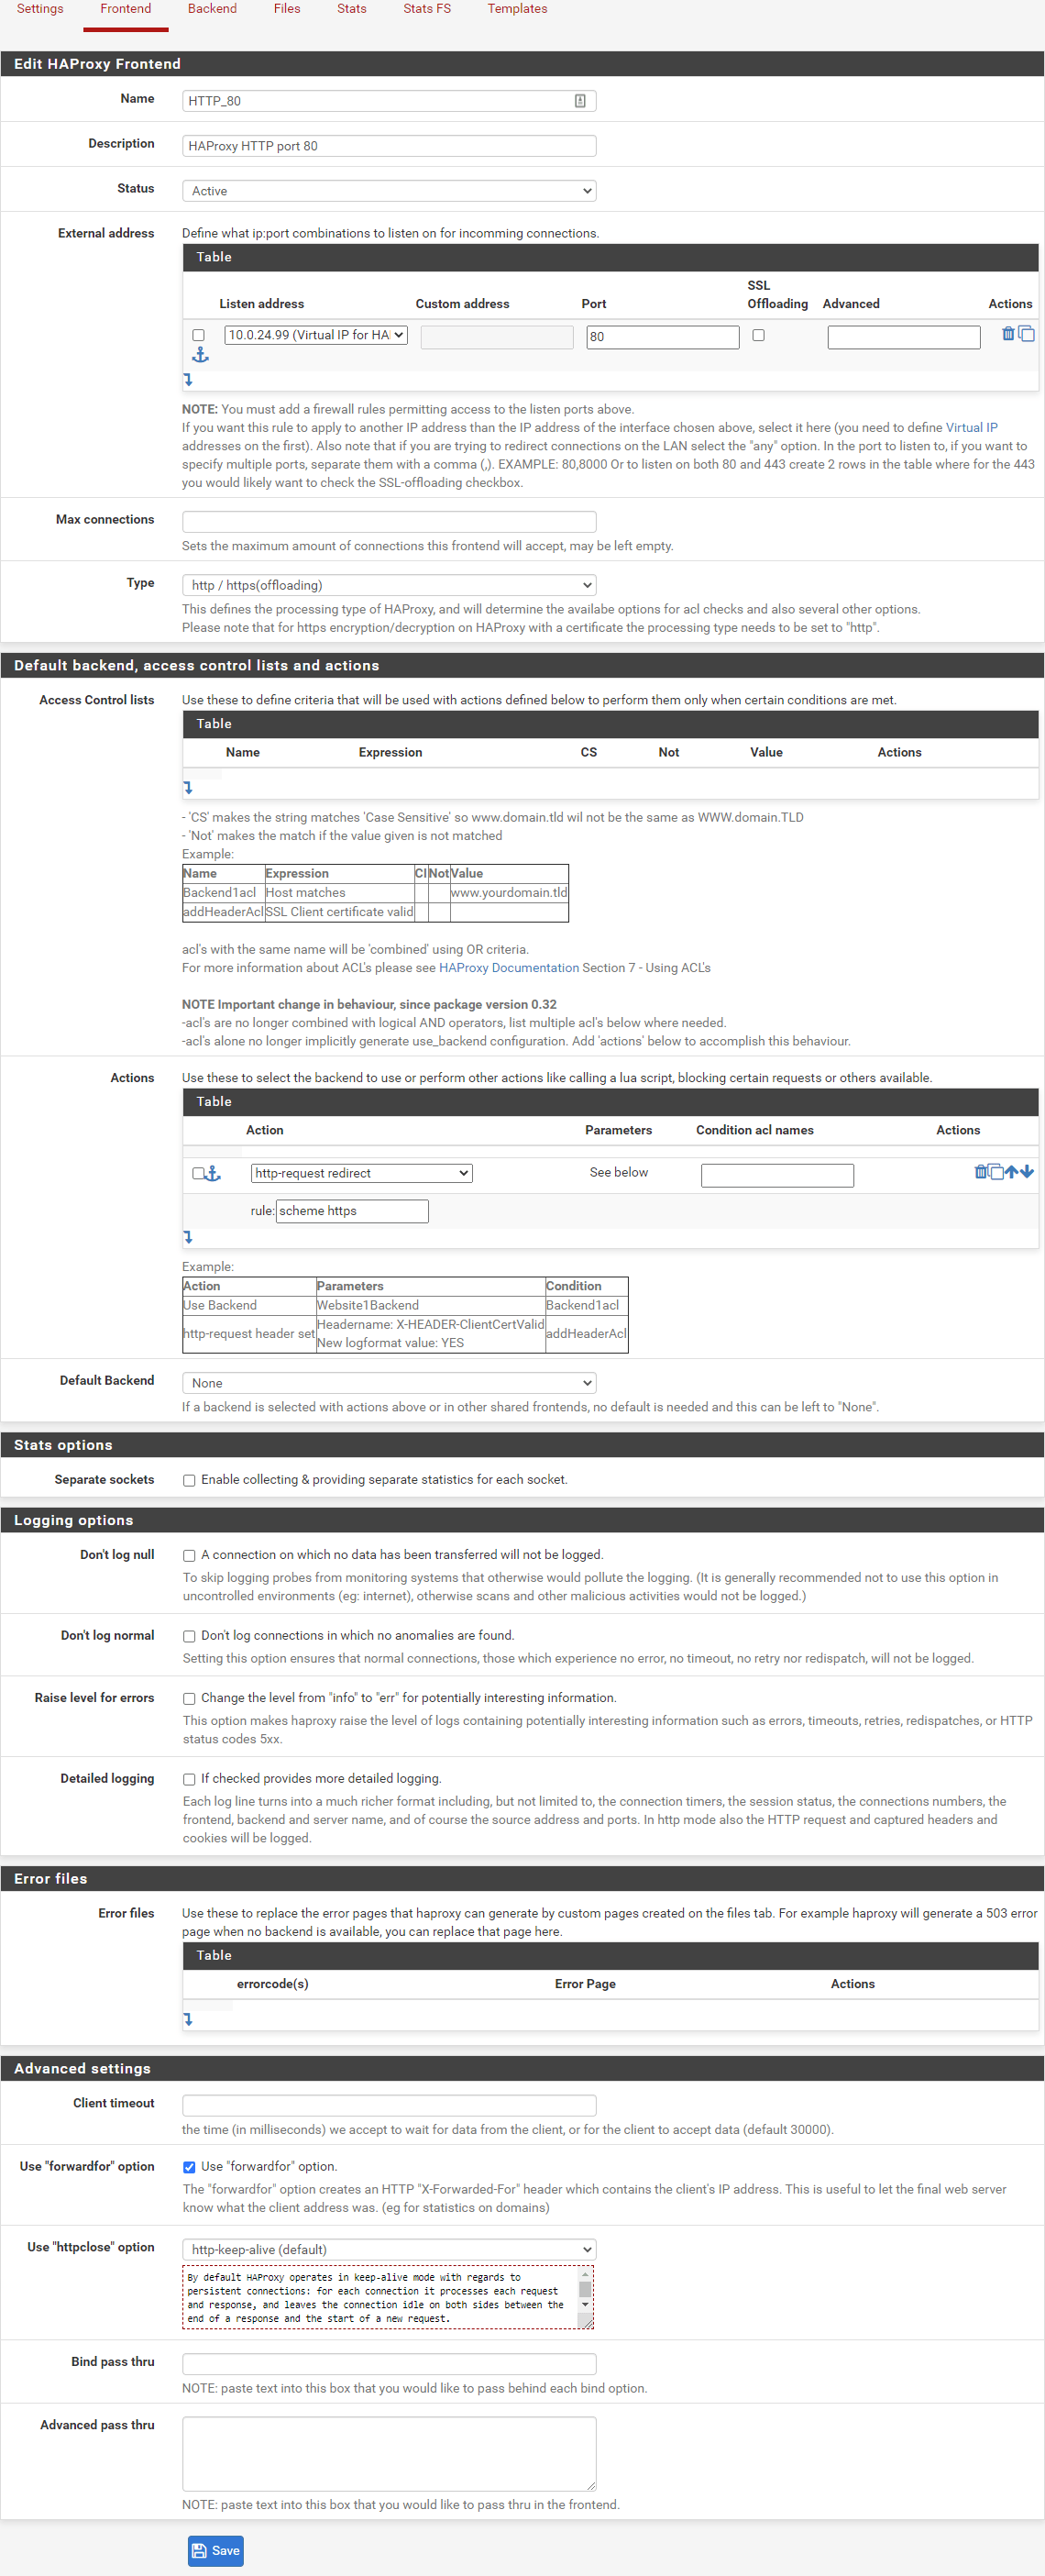
Frontend for HTTP
- In pfSense go to Services -> HAProxy -> Frontend and click Add.
- Fill out as follows:
- Edit HAProxy Frontend:
Name: HTTP_80 (Example)
Description: HAProxy HTTP port 80 (Optional field, example)- External address:
Listen address: 10.0.24.99 (Virtual IP for HAProxy)
Port: 80
- External address:
- Default backend, access control lists and actions:
- Actions:
Action: http-request redirect
rule: scheme https
- Actions:
- Advanced settings:
- Check the Use “forwardfor” option checkbox.
- Edit HAProxy Frontend:
- Click Save.
- Click Apply Changes.
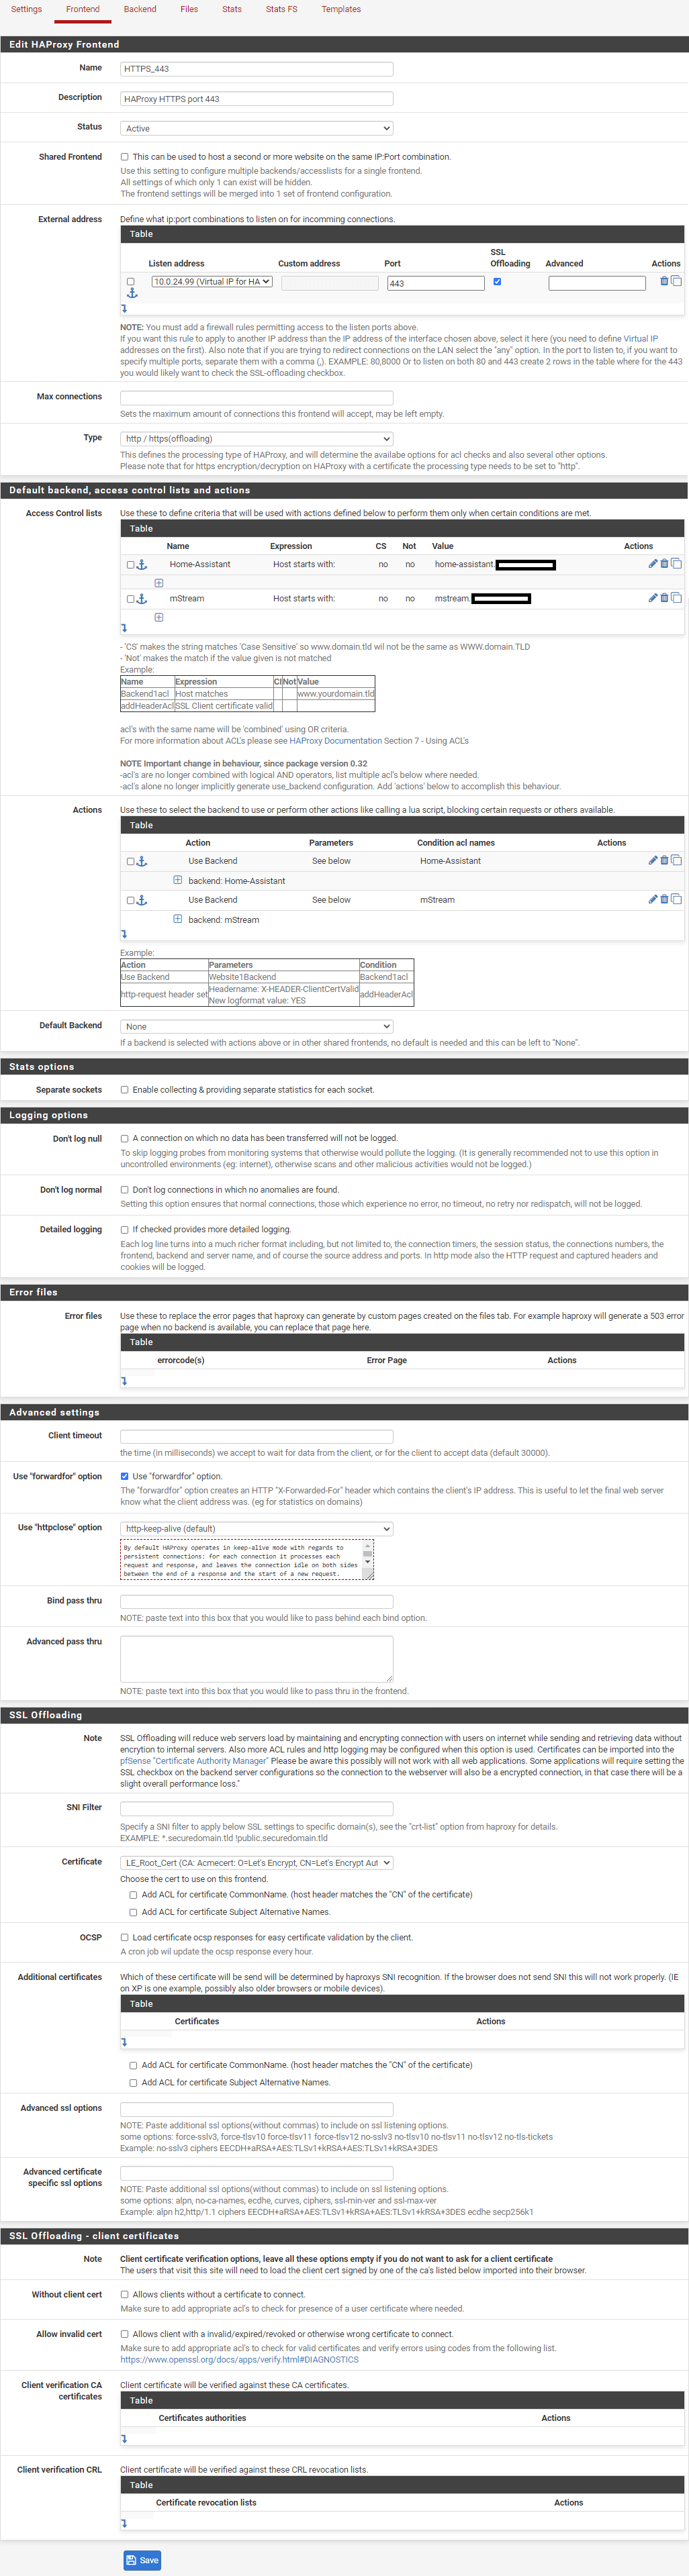
Frontend for HTTPS
- Back in Frontend click Add.
- Fill out as follows:
- HAProxy Frontend:
Name: HTTPS_443 (Example)
Description: HAProxy HTTPS port 443 (Optional field, example)- External address:
Listen address: 10.0.24.99 (Virtual IP for HAProxy)
Port: 443
Check The SSL Offloading checkbox.
- External address:
- Default backend, access control lists and actions:
- Access Control lists:
Name: Name of Service
Expression: Host starts with:
Value: service.yourdomain.com - Actions:
Action: Use Backend
backend: Name of backend (If you don’t find it, make sure it is created in backend first)
Condition acl names: Name (Must be the exact same as the Name-record under Name in “Access Control lists”)
Two Examples of “Access Control lists” and “Actions” table:
Access Control lists:
Name: Home-Assistant
Expression: Host starts with:
Value: home-assistant.yourdomain.com
Name: mStream
Expression: Host starts with:
Value: mstream.yourdomain.com
Actions:
Action: Use Backend
backend: Home-Assistant
Condition acl names: Home-Assistant
Action: Use Backend
backend: mStream
Condition acl names: mStream
- Access Control lists:
- Advanced settings:
Check the Use “forwardfor” option checkbox. - SSL Offloading:
- Certificate: LE_Root_Cert (Example, select your Let’s Encrypt certificate)
- Certificate: LE_Root_Cert (Example, select your Let’s Encrypt certificate)
- HAProxy Frontend:
- Click Save.
- Click Apply Changes.
Results / Extra notes
If all steps was completed successful it should now work like in the picture below

There is also possible to make a Firewall NAT rule to forward HTTP traffic to HTTPS, but because the renewal process of Let’s Encrypt certificates require HTTP to work I chose to not include this rule in my setup, or in this guide.
Sources
- https://www.youtube.com/watch?v=FWodNSZXcXs
- https://serverfault.com/questions/559624/haproxy-503-service-unavailable-no-server-is-available-to-handle-this-request
- https://www.namesilo.com/Support/Point-Domain-to-an-IP-Address
- https://www.duckdns.org/faqs.jsp
- https://www.joe0.com/2019/11/11/how-to-implement-remote-management-in-pfsense-2-4-4-by-using-a-duckdns-dynamic-dns-domain/