
Tasker is a very powerful tool to create automated tasks in Android. This can for example be used to report events happening on a mobile phone to Home-Assistant. This is a guide to do exactly that, but it is not a general guide to Tasker.
The steps in this guide are based on a post by “bokub” in the Home-Assistant forum (link i sources).
Create Access Token
- Go to your Home-Assistant profile page by selecting the username at the bottom of the left-bar, or just go to http://<ip>:<port>/profile.
- Scroll to the end of the page and select Create Token under Long-Lived Access Tokens.
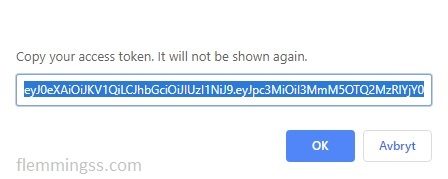
- Give the token a recognizing name and click ok. Then Copy your access token and select OK.
Create Tasker Variables
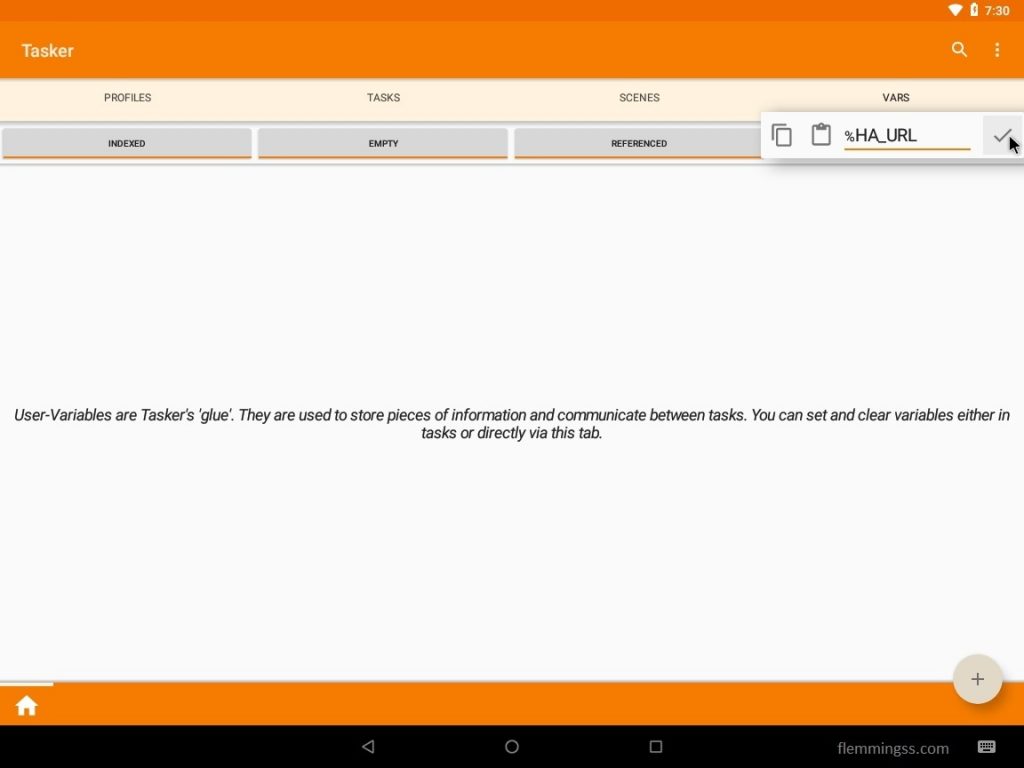
- In Tasker select the VARS tab and create a new task with the plus-icon down at the right corner. Give it a name “HA_URL“, and select the check-mark.
- Click the variable and give it the value of your Home-Assistant url.
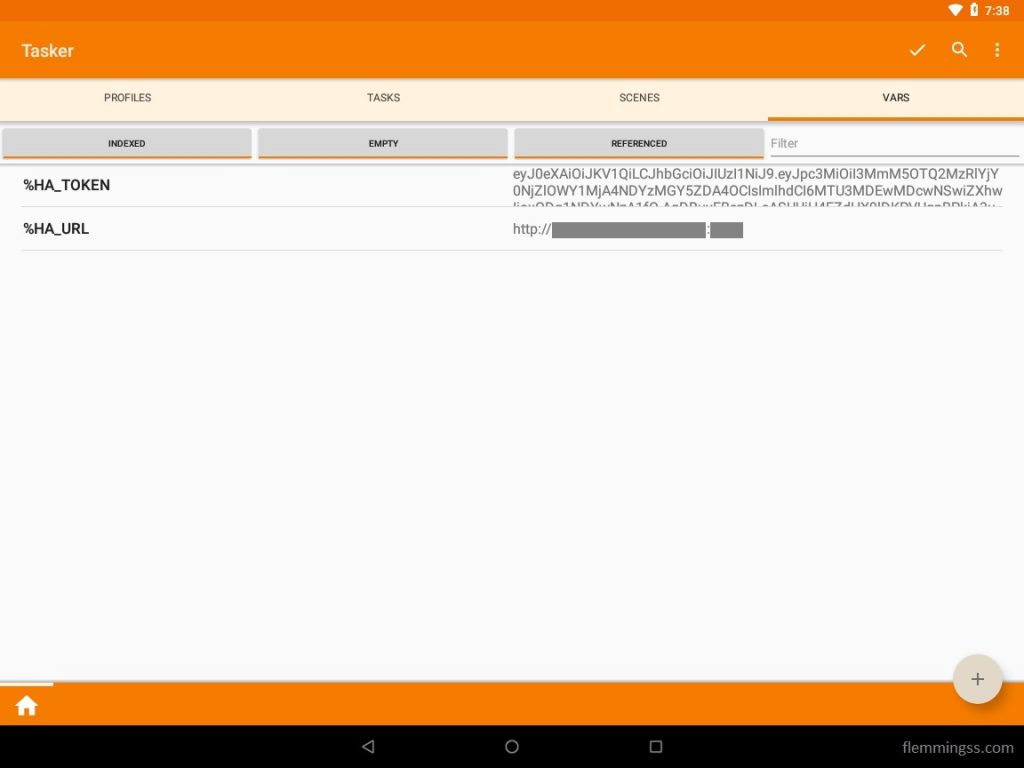
http://<ip>:<port> - Follow the same two steps and create another variable with the name “HA_TOKEN” with value of the earlier created token.
eyJ0eXAiOiJKV1QiLCJhbGciOiJIUzI1NiJ9.eyJpc3MiOiI3MmM5OTQ2MzRlYjY0NjZlOWY1MjA4NDYzMGY5ZDA4OCIsImlhdCI6MTU3MDEwMDcwNSwiZXhwIjoxODg1NDYwNzA1fQ.AgDBuyEBszDLsASUUiH4FZdHX9lDKPVUgnBPkjA3uqA - With both variables created click the “Apply” check-mark in upper right corner.
Create a Call-task
- In tasker select the TASKS tab and create a new task with the plus-icon down at the right corner. Give it a name “HA_CALL“, and select the check-mark.
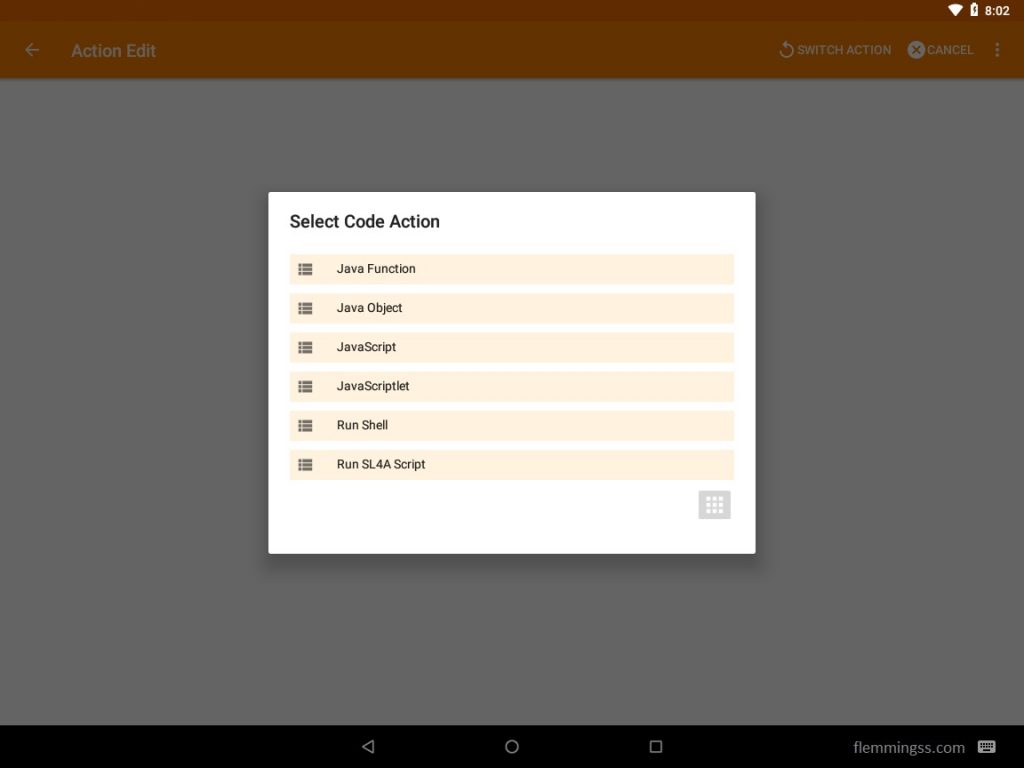
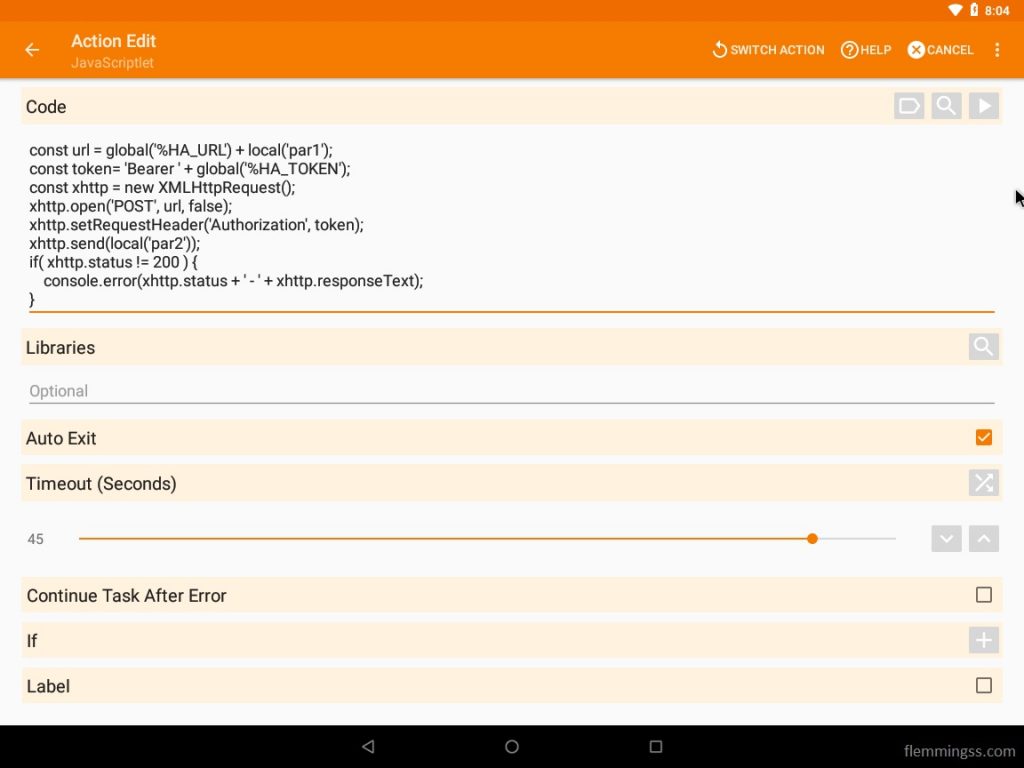
- Tasker will now navigate to Task Edit. Click the plus-icon down at the right to create a new action. Select Code and then JavaScriptlet (the menu is scroll-able).
- Paste the following code into the code field:
const url = global('%HA_URL') + local('par1');
const token= 'Bearer ' + global('%HA_TOKEN');
const xhttp = new XMLHttpRequest();
xhttp.open('POST', url, false);
xhttp.setRequestHeader('Authorization', token);
xhttp.send(local('par2'));
if( xhttp.status != 200 ) {
    console.error(xhttp.status + ' - ' + xhttp.responseText);
}- Click the <- back-button in upper left corner twice to go back to Tasks.
- Then click the Apply check-mark in upper right corner.


Usage
Now we can use this HA_TASK inside other tasks to control Home-Assistant trough the API. This is a test demonstrating toggle of a input_boolean from Tasker.
- Open configuration.yaml and create a new Input Boolean, then restart Home-Assistant.
input_boolean:
  tasker_test: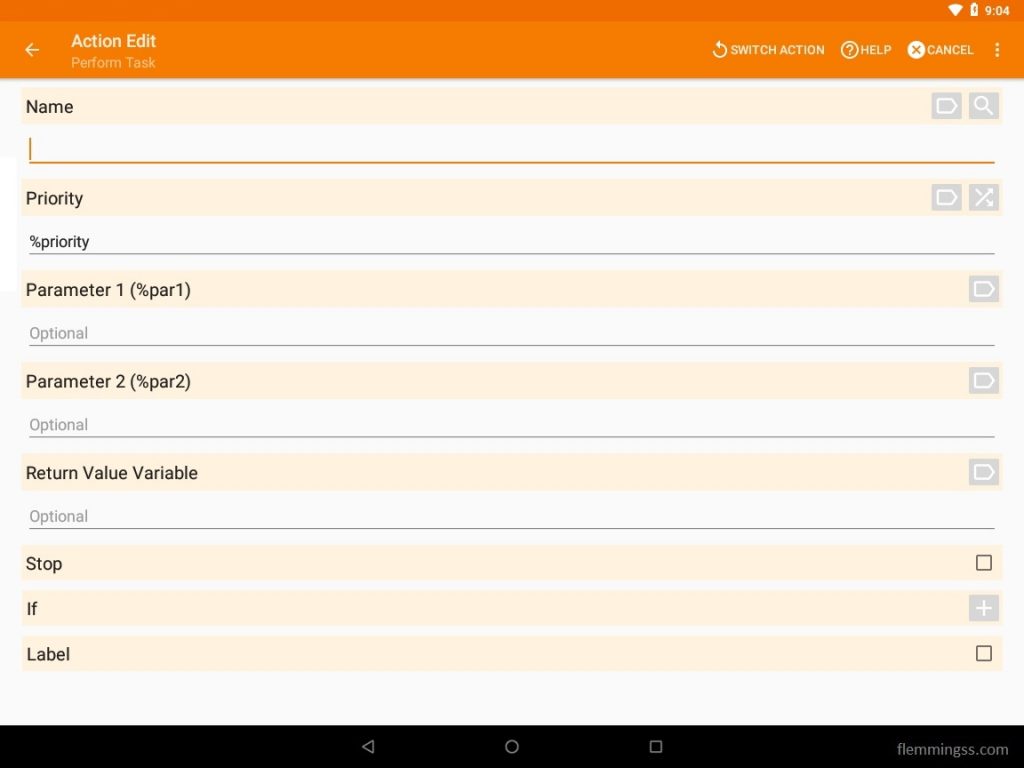
name: Tasker Test- In Tasker select the TASKS tab and Create a new task with the plus-icon down at the right corner. Giv it a name “HA_TASK“, and select the check-mark.
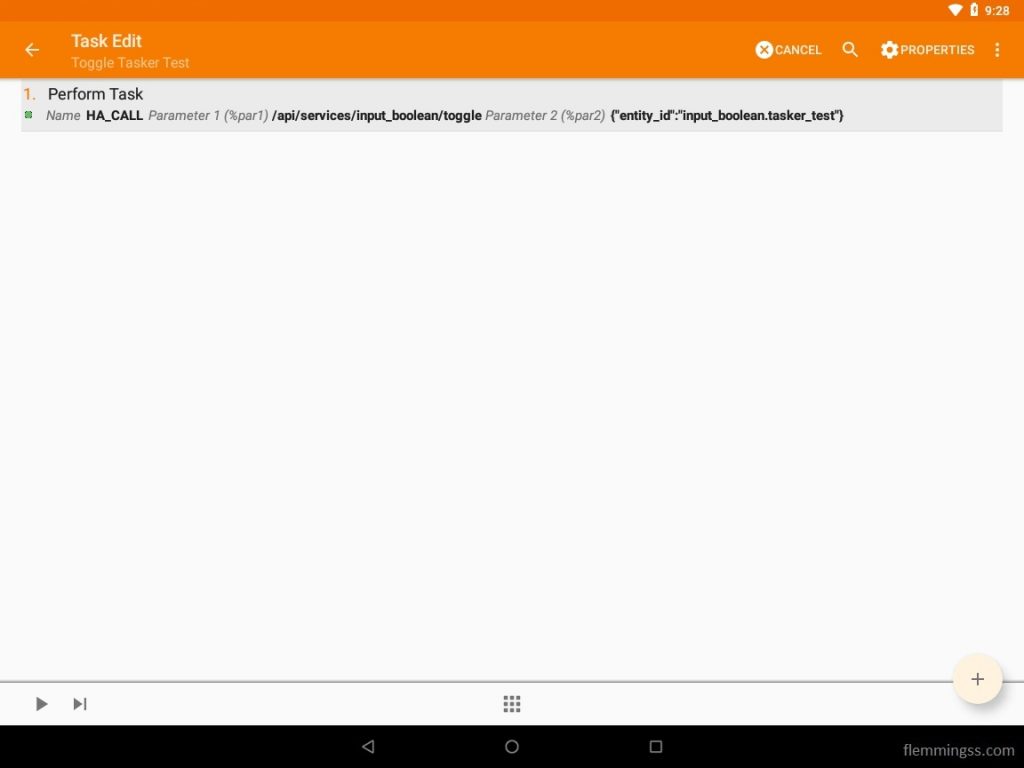
- Tasker will now navigate to Task Edit. Click the plus-icon down at the right corner to create a new action. Select Task and then Perform Task.
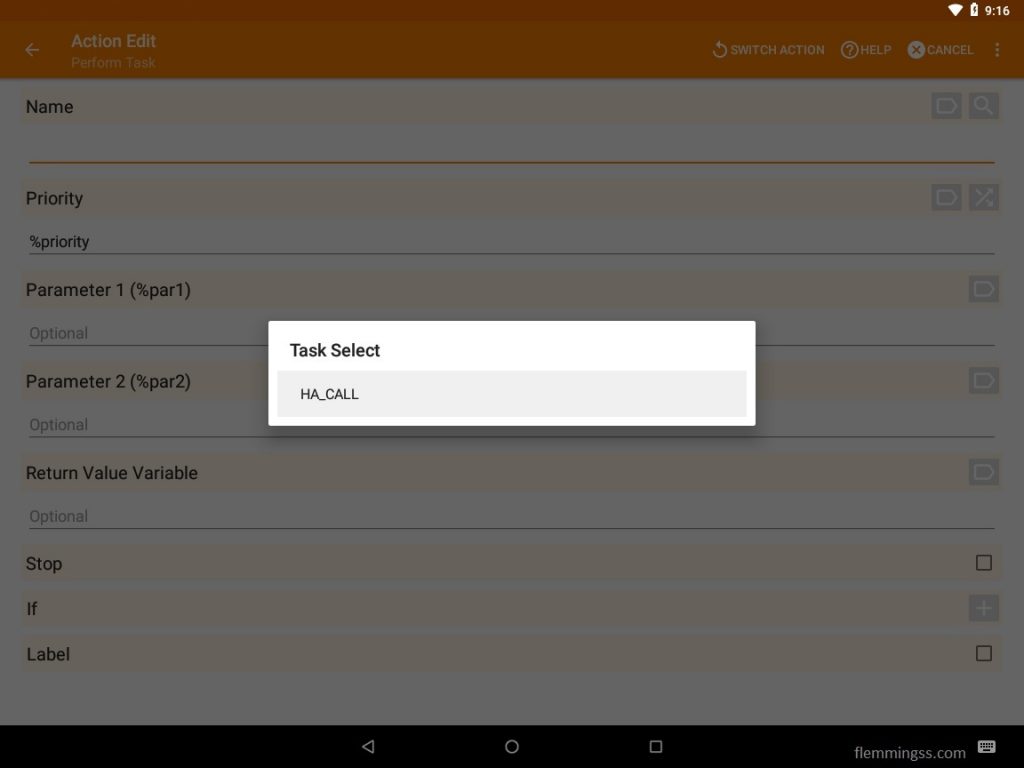
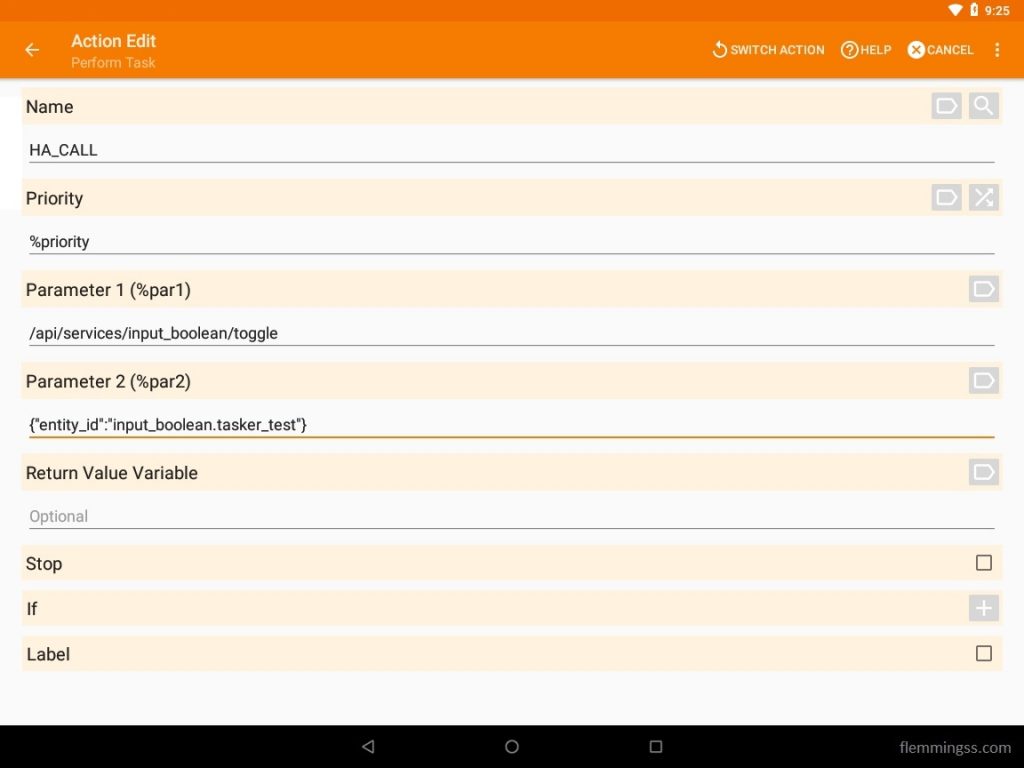
- Click the magnifying glass icon on Name and select HA_CALL (important: It has to be selected, just writing “HA_CALL” will not work).
- In Parameter 1 write:
/api/services/input_boolean/toggle - In Parameter 2 write:
{"entity_id":"input_boolean.tasker_test"} - Click the <- back-button in upper left corner to go back to Edit Task.
- Click the Play icon to test if it works.
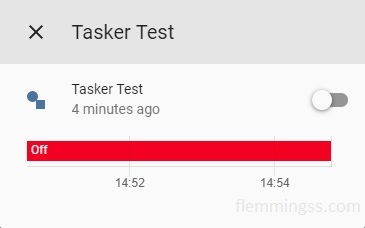
Looking at the Input Boolean entity in Home-Assistant confirms that is is working.

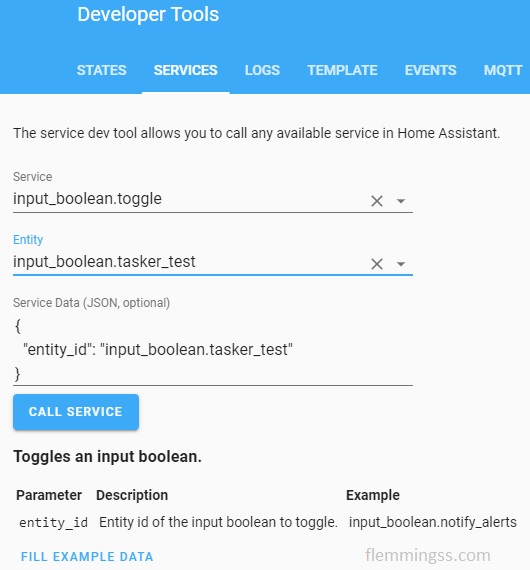
This is how it’s done. Parameter 1 and Parameter 2 can be changed to what fits your needs. Information about correct services, entity and JSON service data can be found in the Home-Assistant GUI under Services inside Developer Tools.
Too complicated? Then you can check out Home Assistant Plug-In for Tasker.